🔎 Get Familiar with WordPress Menus 🔬
📝 Posts Menu: Managing Your Blog Content

The Posts menu in WordPress is where you manage blog content. It includes options to view, add, categorize, and tag your posts.
📑 Posts » All Posts
The All Posts page displays a list of all blog posts you’ve created. Here, you can:
☑ View and manage all existing posts
☑ Edit, Quick Edit, Trash, or View individual posts
☑ Filter posts by category, date, or status
☑ Use Bulk Actions to apply changes to multiple posts at once
🖊️ Posts » Add New Post
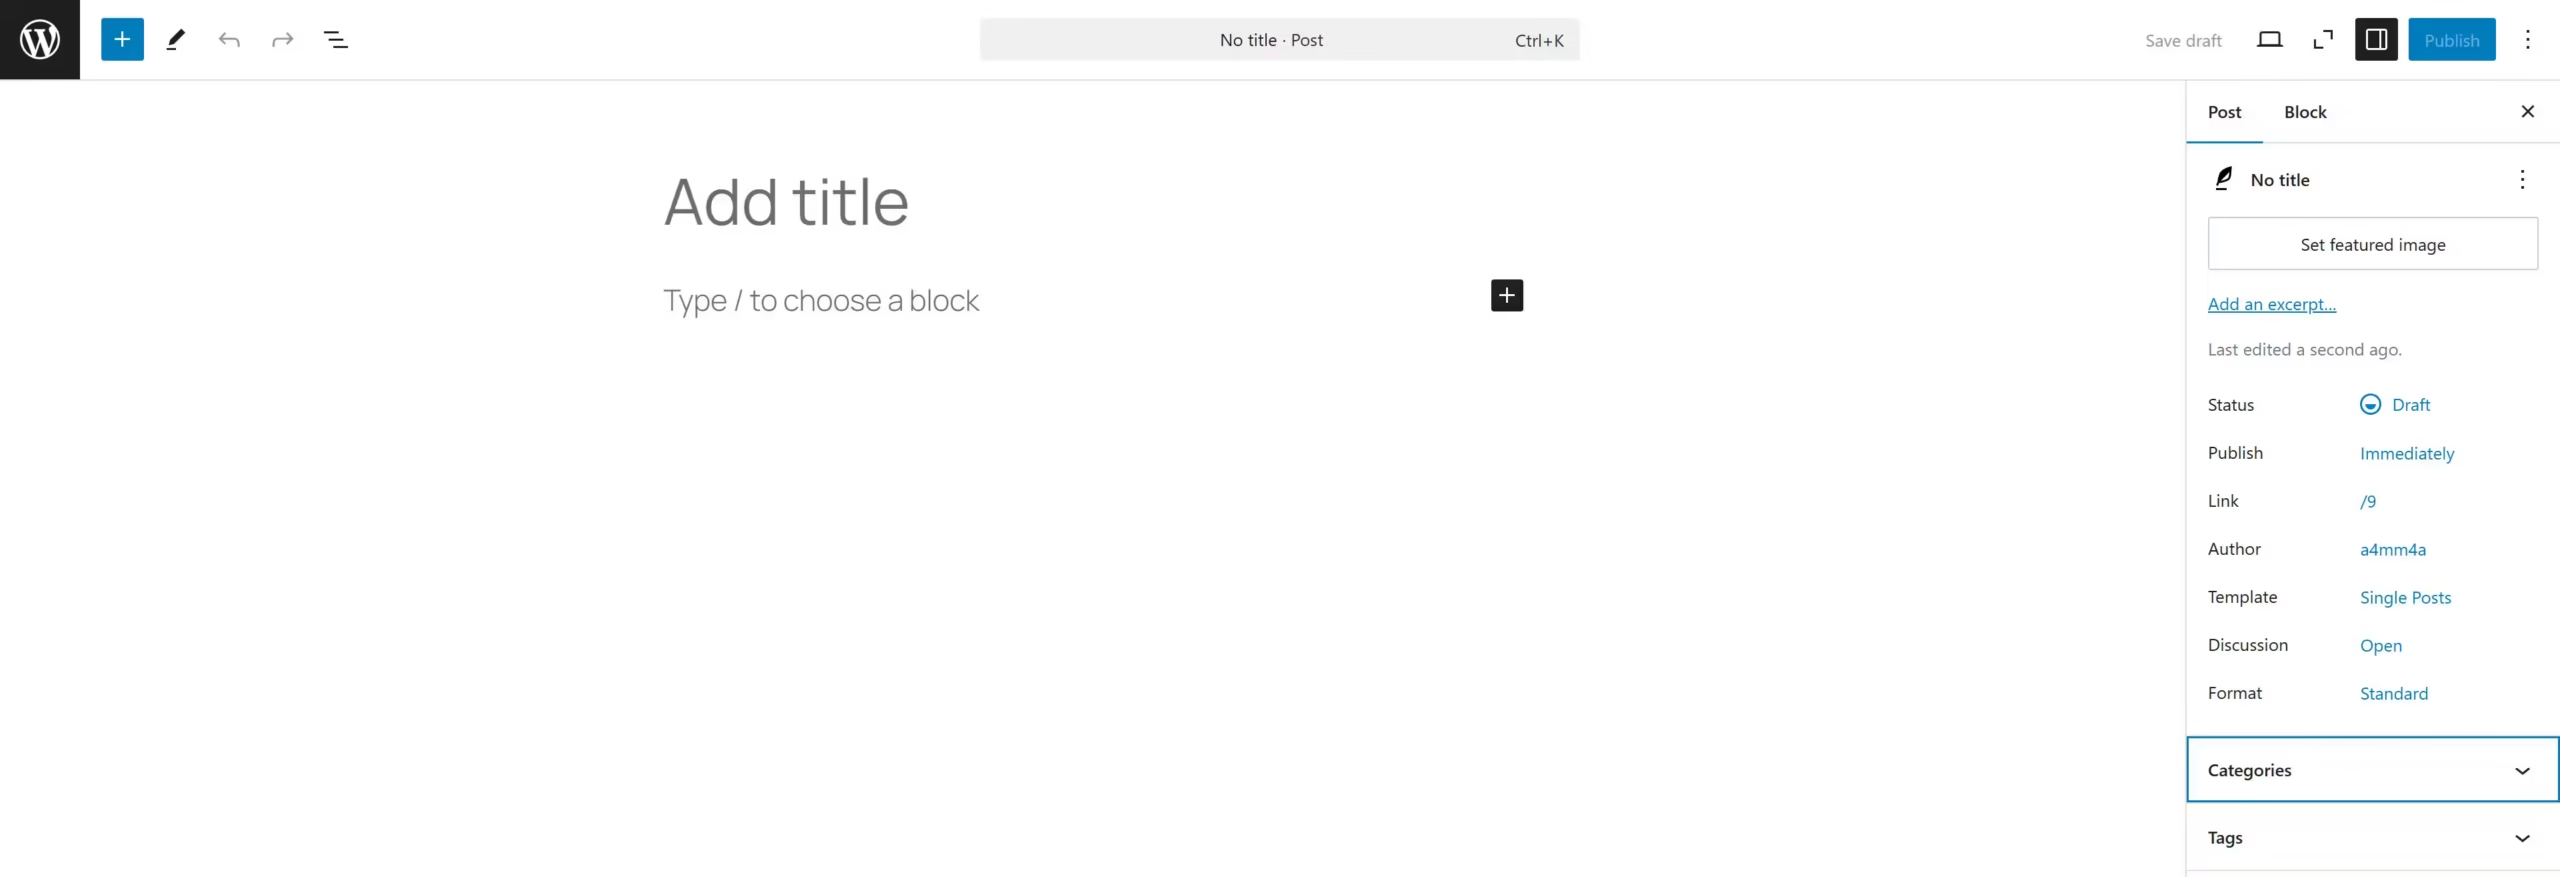
This option allows you to create new blog posts with the WordPress Block Editor (Gutenberg).
Key Features:
☑ Title & Content Area – Write and format your post
☑ Add Images & Videos – Upload media to enhance your post
☑ Categories & Tags – Organize posts for easy navigation
☑ Featured Image – Set a primary image for your post
☑ Permalinks – Customize the URL for SEO optimization
☑ Publish Settings – Choose to publish immediately, schedule, or save as a draft
📂 Posts » Categories
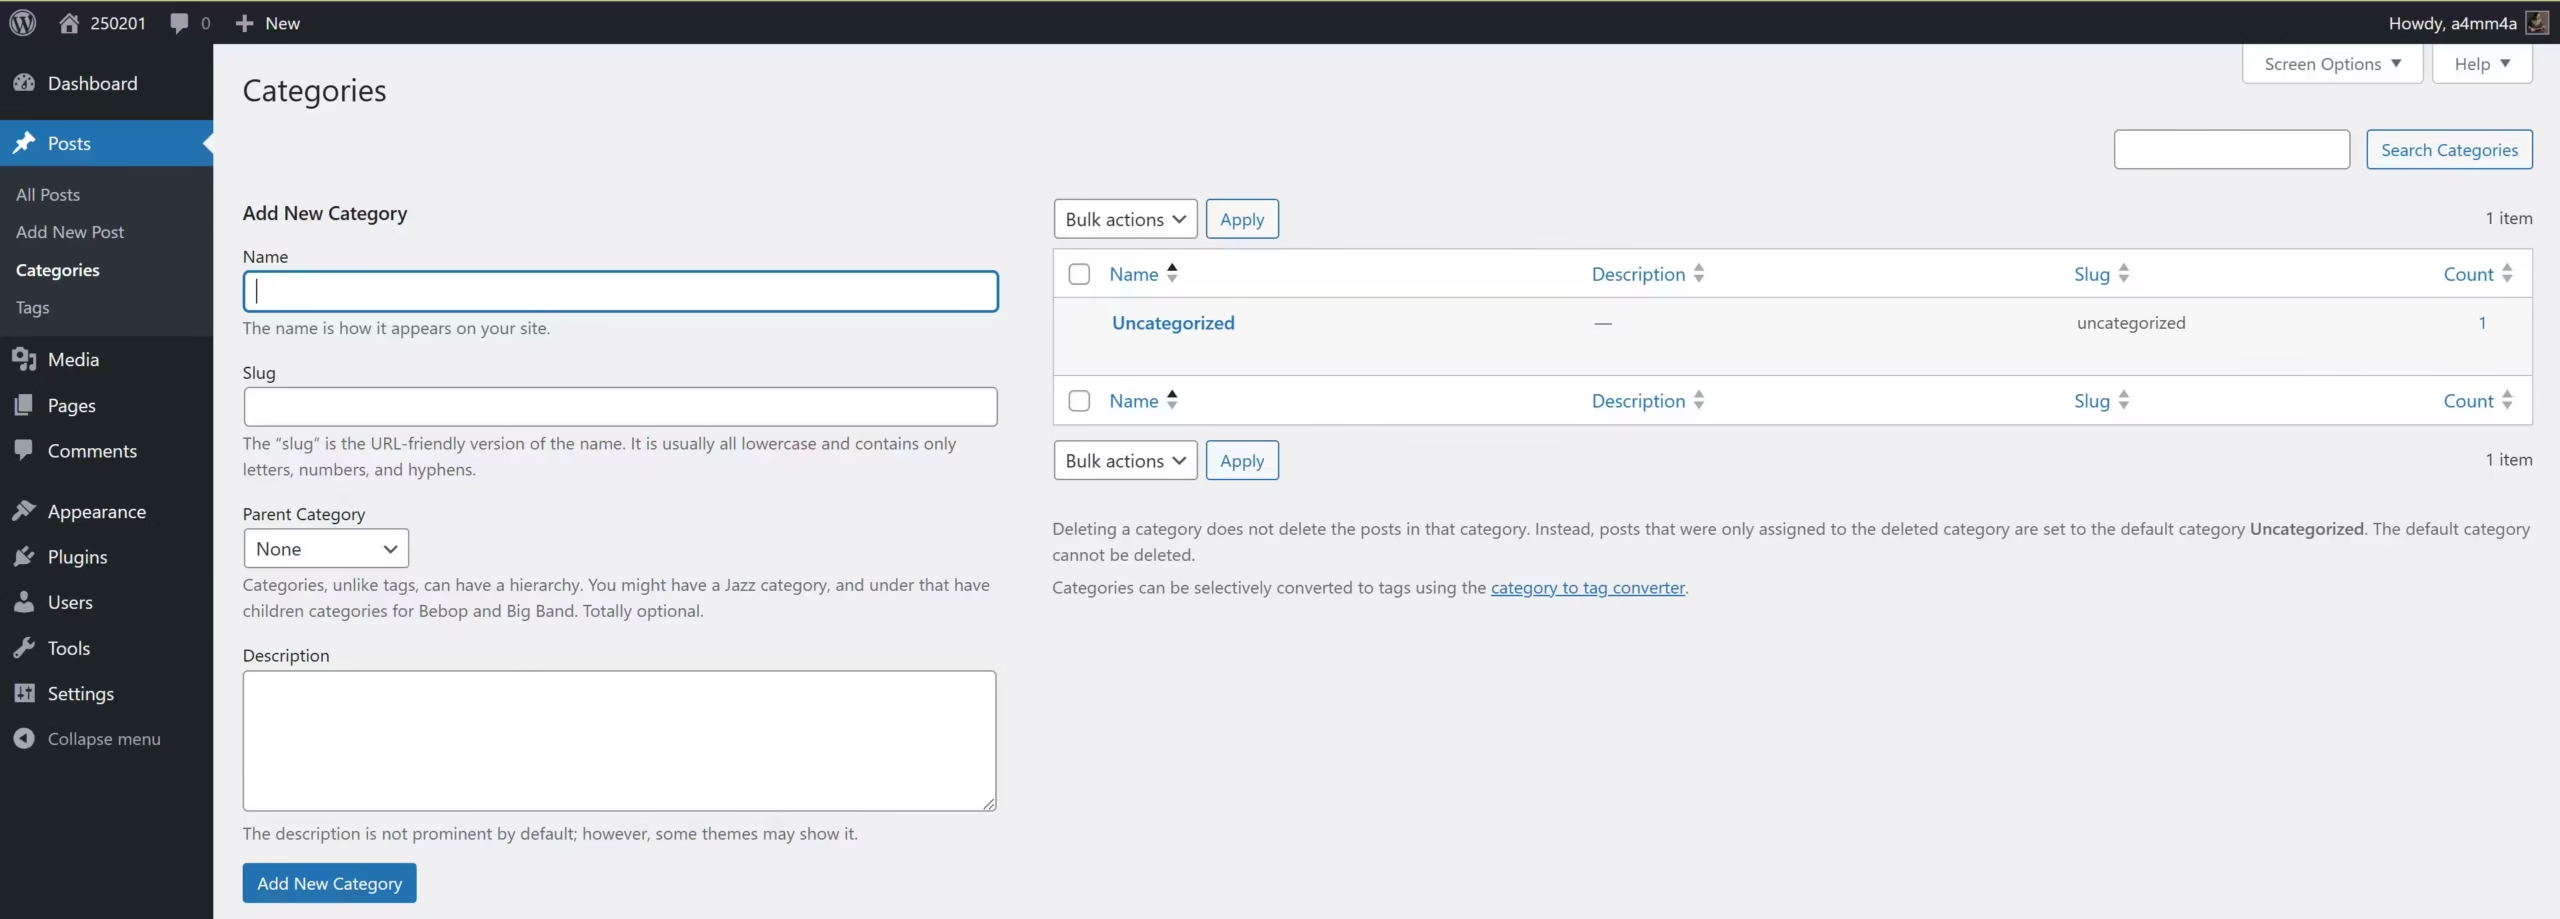
Categories help organize your posts into broad topics.
☑ Add New Category – Name and assign categories to posts
☑ Parent Categories – Create subcategories for better structure
☑ Slug – Customize URLs for each category
☑ Description – Provide information about each category
Example:
- Gaming (Parent)
- 🎮 Xbox
- 🕹️ PlayStation
- 🎯 PC Games
🏷️ Posts » Tags
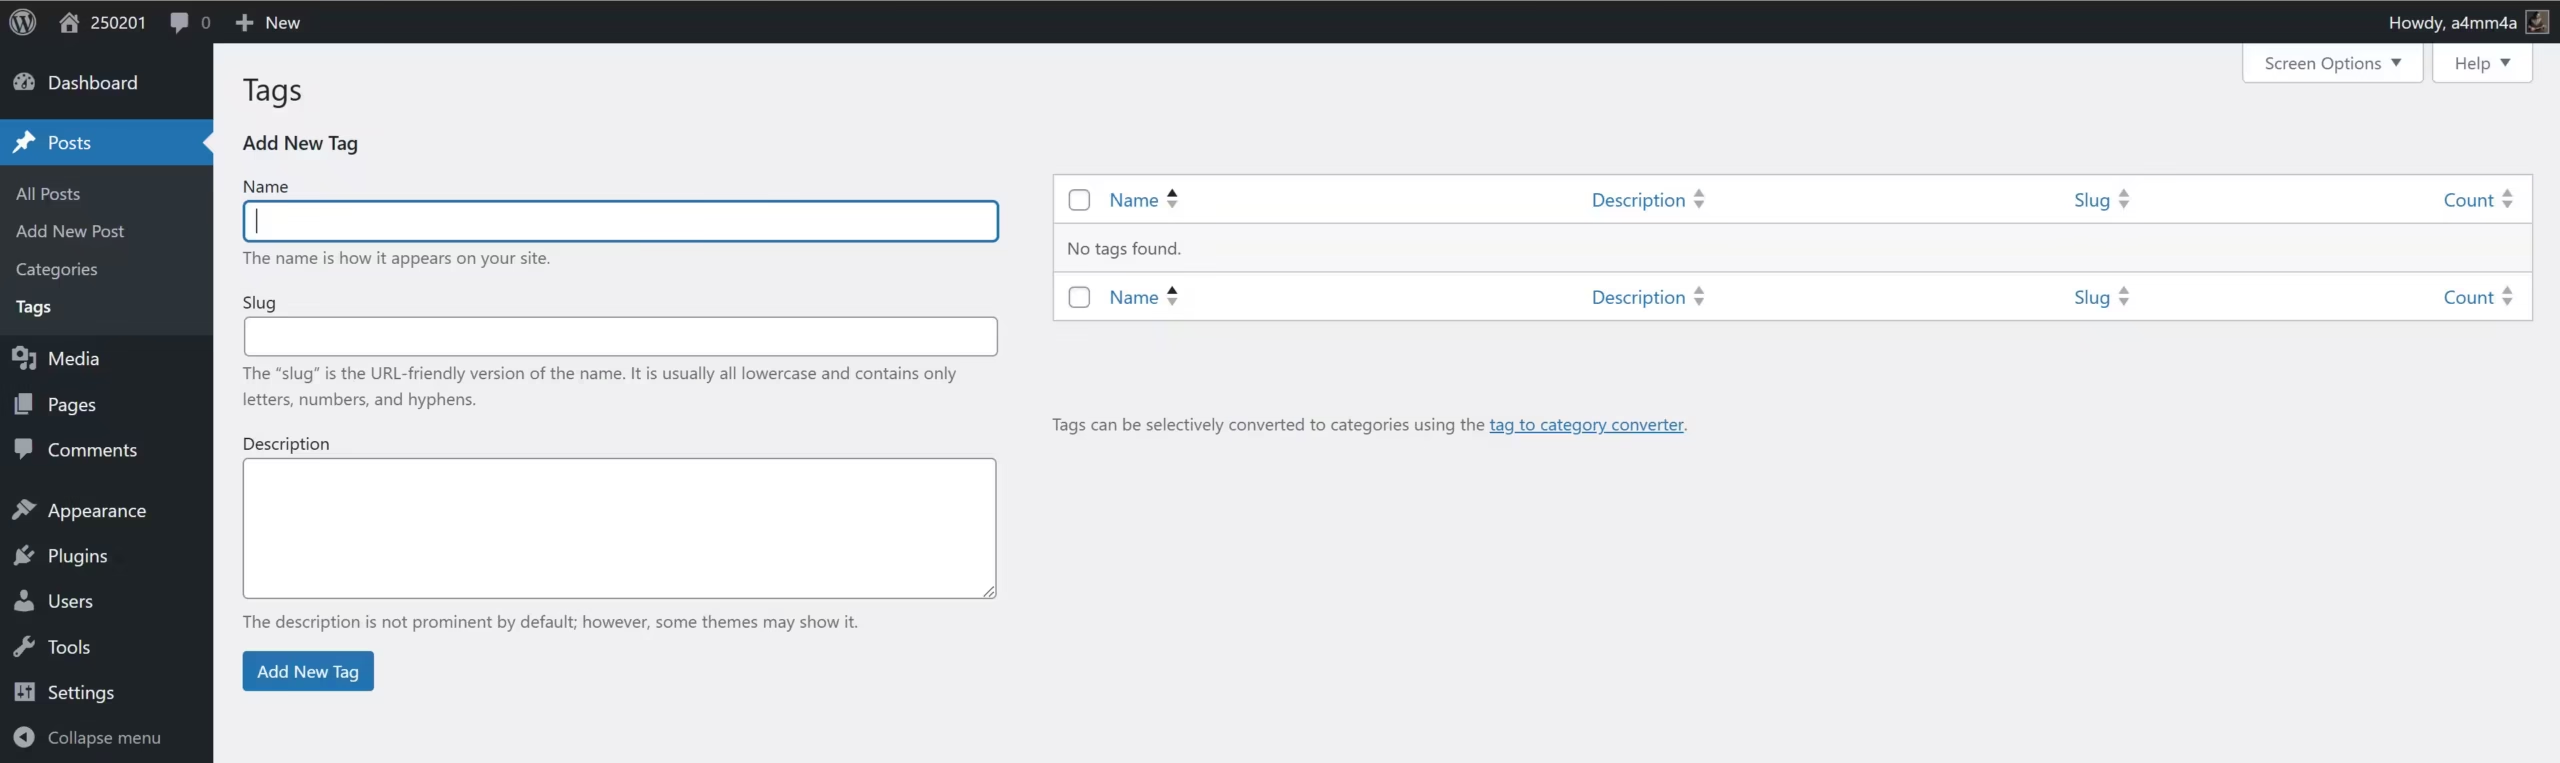
Tags are more specific than categories and help users find related content.
☑ Assign tags to posts – Improve content discoverability.
☑ Custom slugs – Optimize URLs for SEO.
☑ Organize posts – Easily link related topics
Example:
- A post in the “Gaming” category might have the tags:
- 🎮 Xbox, Multiplayer, Action, Strategy
🎞️ Media: Managing Your Website’s Files
🖼️ Media Library
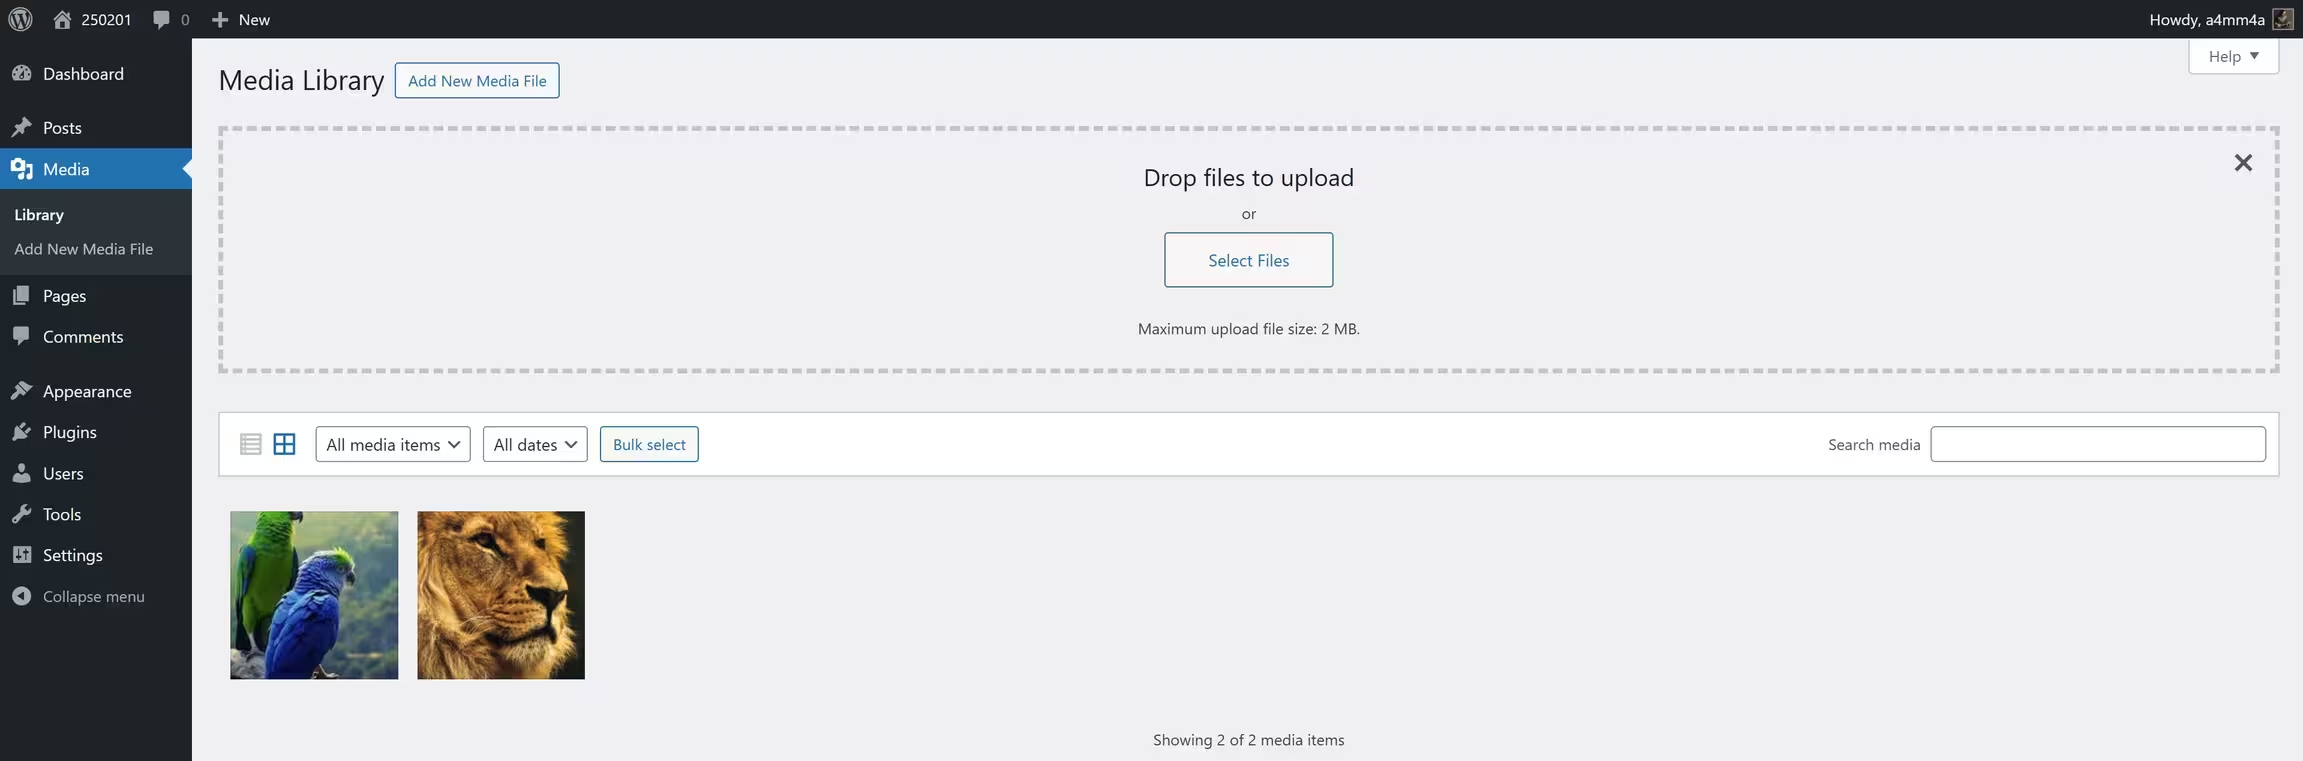
The Media Library stores all uploaded files, making it easy to organize and reuse them. Here’s what you can do:
☑ View All Media – Browse through all uploaded files
☑ Filter Files – Sort by media type or upload date
☑ Bulk Select – Manage multiple files at once (delete, edit, etc.)
☑ Search Media – Find specific files by name
🔍 List View & Grid View
☑ List View – Displays media in a table format with file details
☑ Grid View – Shows thumbnails for a quick visual overview
📤 Add New Media File
To upload a new media file:
☑ Drag & Drop files directly into the uploader
☑ Click “Select Files” to choose files from your computer
☑ Check the upload limit – Default maximum file size: 2 MB (This may vary depending on your hosting settings)
Supported file types:
📷 Images – JPG, PNG, GIF
🎥 Videos – MP4, MOV
🎵 Audio – MP3, WAV
📄 Documents – PDF, DOCX
🛠️ Editing Media Files
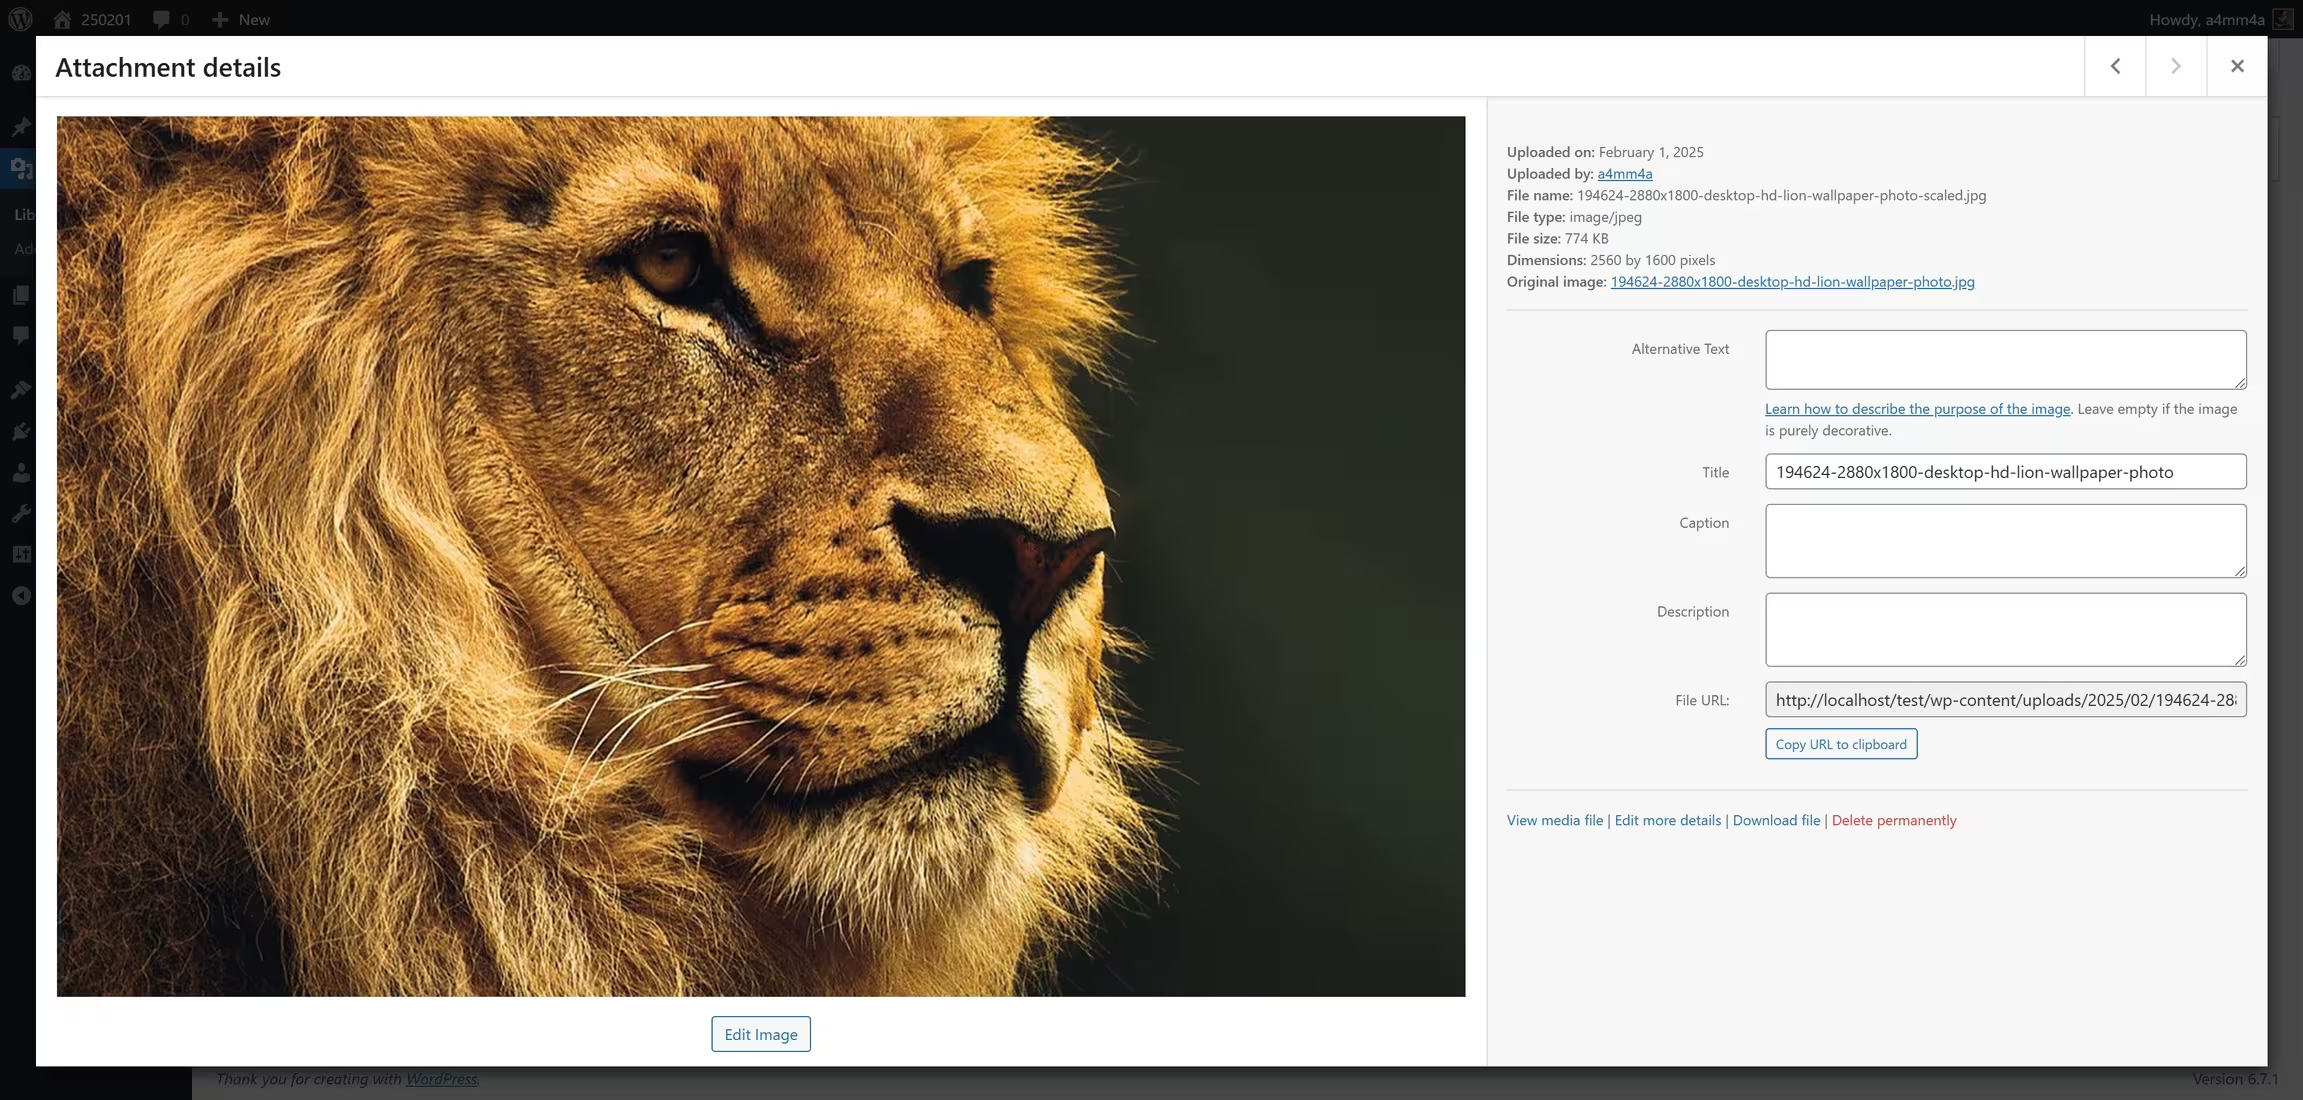
Once uploaded, you can edit media files directly in WordPress:
☑ Edit Image – Crop, rotate, resize, or flip images
☑ Change File Name & Alt Text – Improve SEO and accessibility
☑ Replace Media – Swap an existing file with a new version
🖼️ Available Image Editing Tools in WordPress
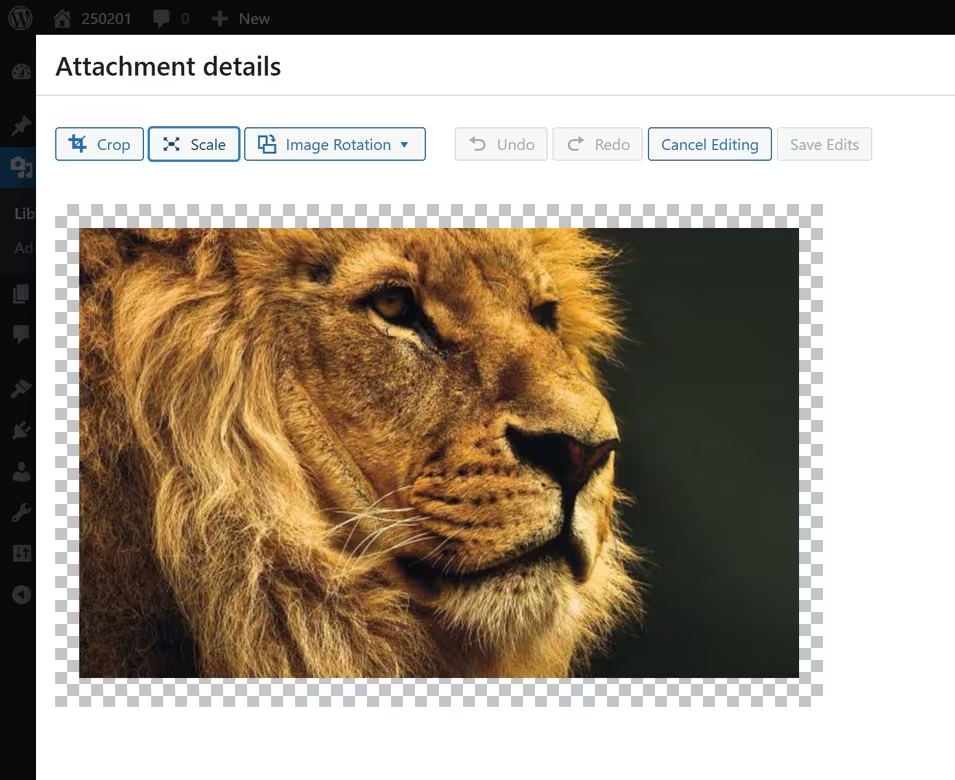
Once in the editor, you’ll see several options:
- ✂️ Crop
Click the Crop button, then drag to select the area you want to keep.
You can adjust the aspect ratio (e.g., 1:1 for square images).
Click Apply Crop to save the changes. - ↕️ Scale
Allows you to resize an image while maintaining its aspect ratio.
Enter new width and height values in the Scale Image fields.
WordPress won’t scale images up, only down. - 🔄 Rotate
Click the Rotate Left or Rotate Right buttons to adjust orientation.
Useful for fixing sideways images uploaded from mobile devices. - 🔄 Flip
Click Flip Vertical or Flip Horizontal to mirror the image. - 📍 Undo & Redo
If you make a mistake, use the Undo and Redo buttons to revert changes.
📄 Pages: Creating and Managing Static Content
The Pages menu in WordPress allows you to create and manage static content such as About Us, Contact, Privacy Policy, and other essential pages that don’t change frequently. Unlike Posts, pages are not organized by date or categories but are typically used for important, evergreen content.
📜 Pages List: Managing Your Website's Pages
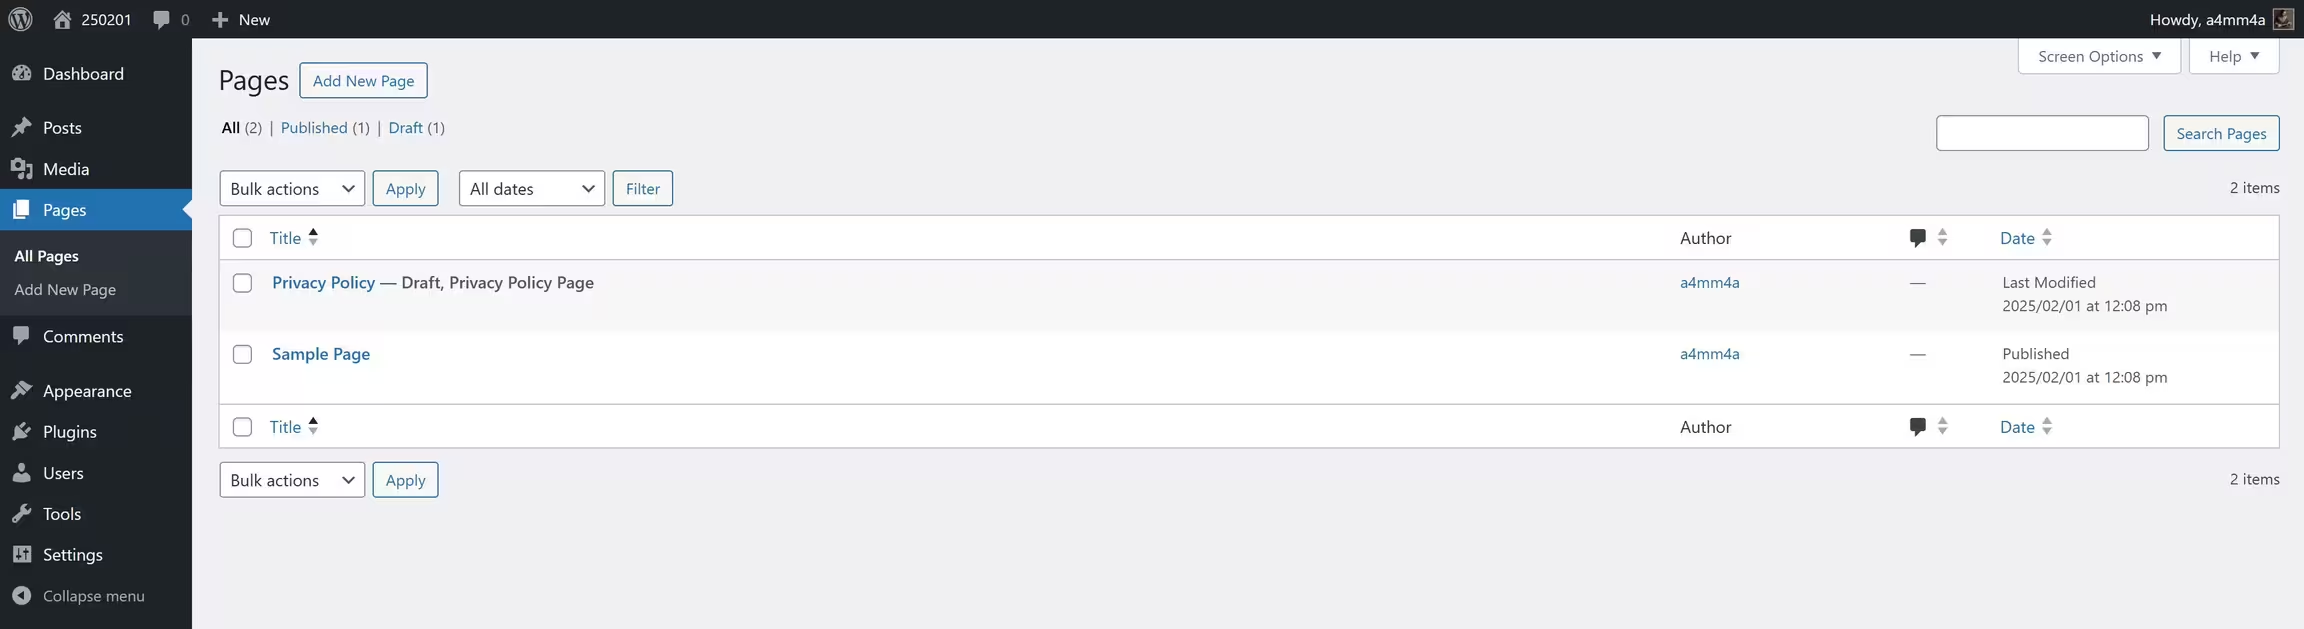
In this section, you can view and manage all your pages.
☑ All Pages – View a complete list of all pages on your site
☑ Published Pages – View only live pages visible to visitors
☑ Draft Pages – See pages saved as drafts (not yet published)
☑ Search Pages – Find specific pages by title
🔧 Bulk Actions for Pages
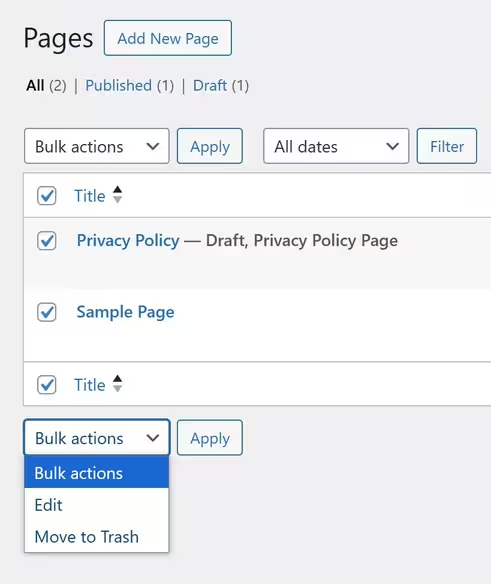
You can manage multiple pages at once using bulk actions:
☑ Edit – Modify details of selected pages
☑ Move to Trash – Delete multiple pages quickly
🗂 Sorting & Filtering Pages
☑ Filter by Date – View pages based on their creation or modification date
☑ Sort by Title or Menu Order – Arrange pages in ascending/descending order
➕ Add New Page
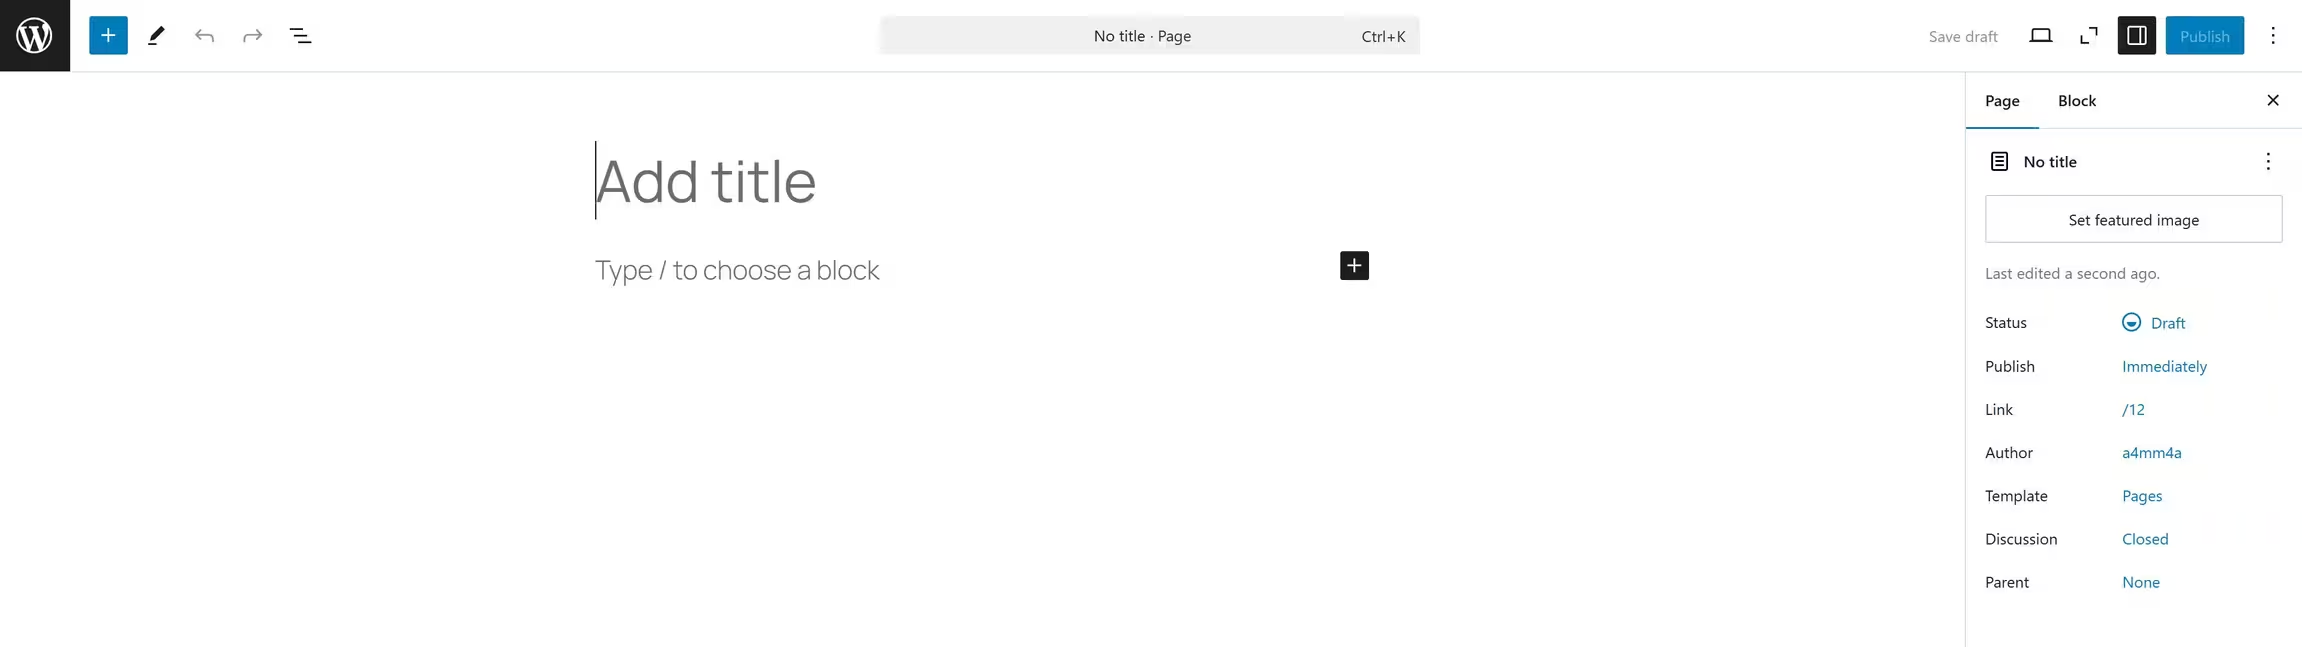
1️⃣ Go to Pages → Add New
2️⃣ Enter a Title – This will be the name of your page (e.g., “About Us”)
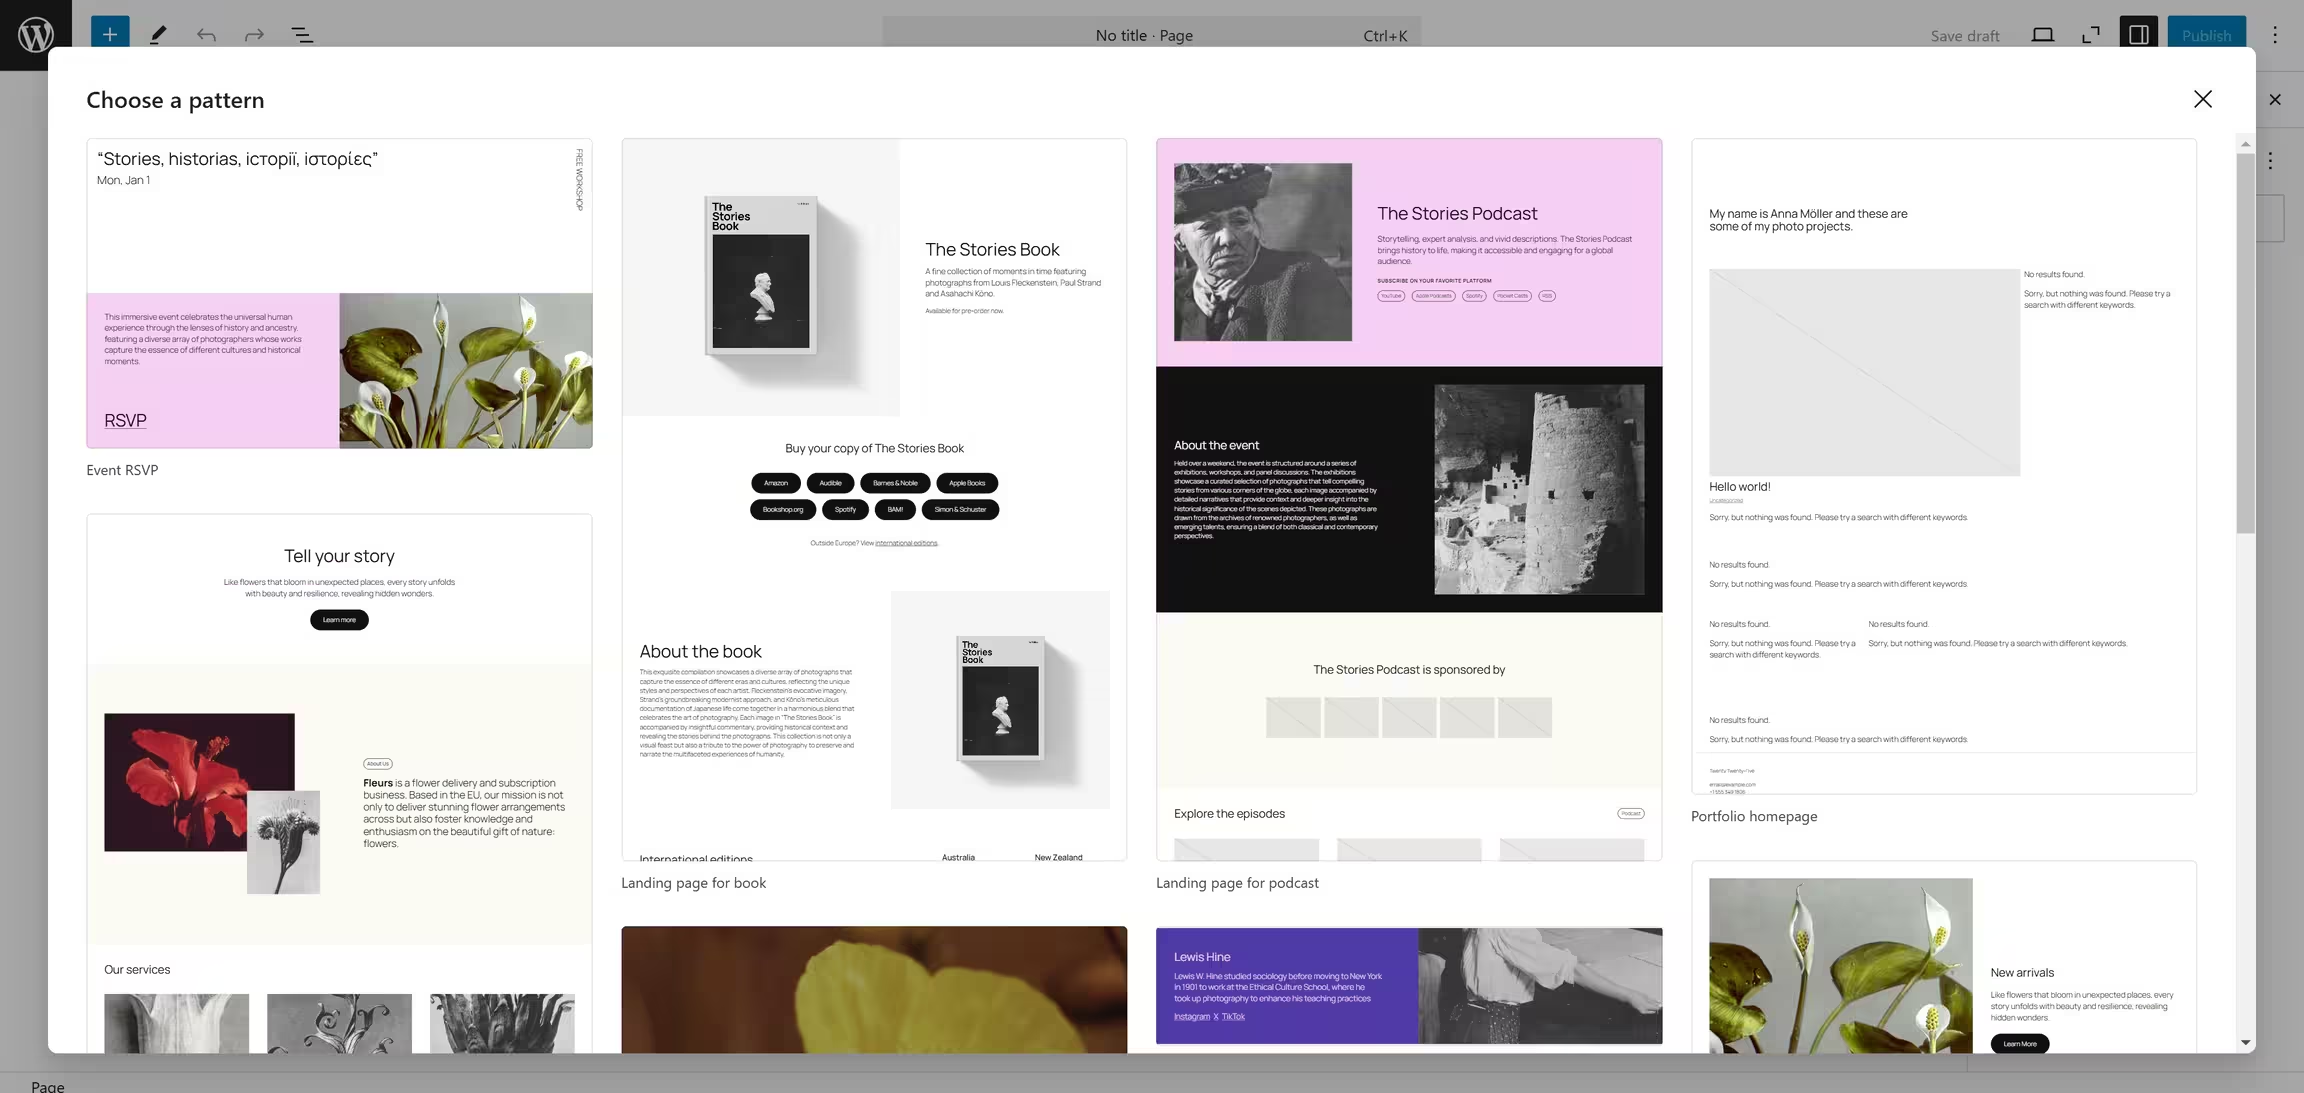
3️⃣ Write Content – Use the WordPress block editor (Gutenberg) or Classic Editor
4️⃣ Set a Featured Image (Optional) – Helps with page branding
5️⃣ Publish or Save as Draft – If not ready, save as a draft for later
✏️ Quick Actions for Existing Pages
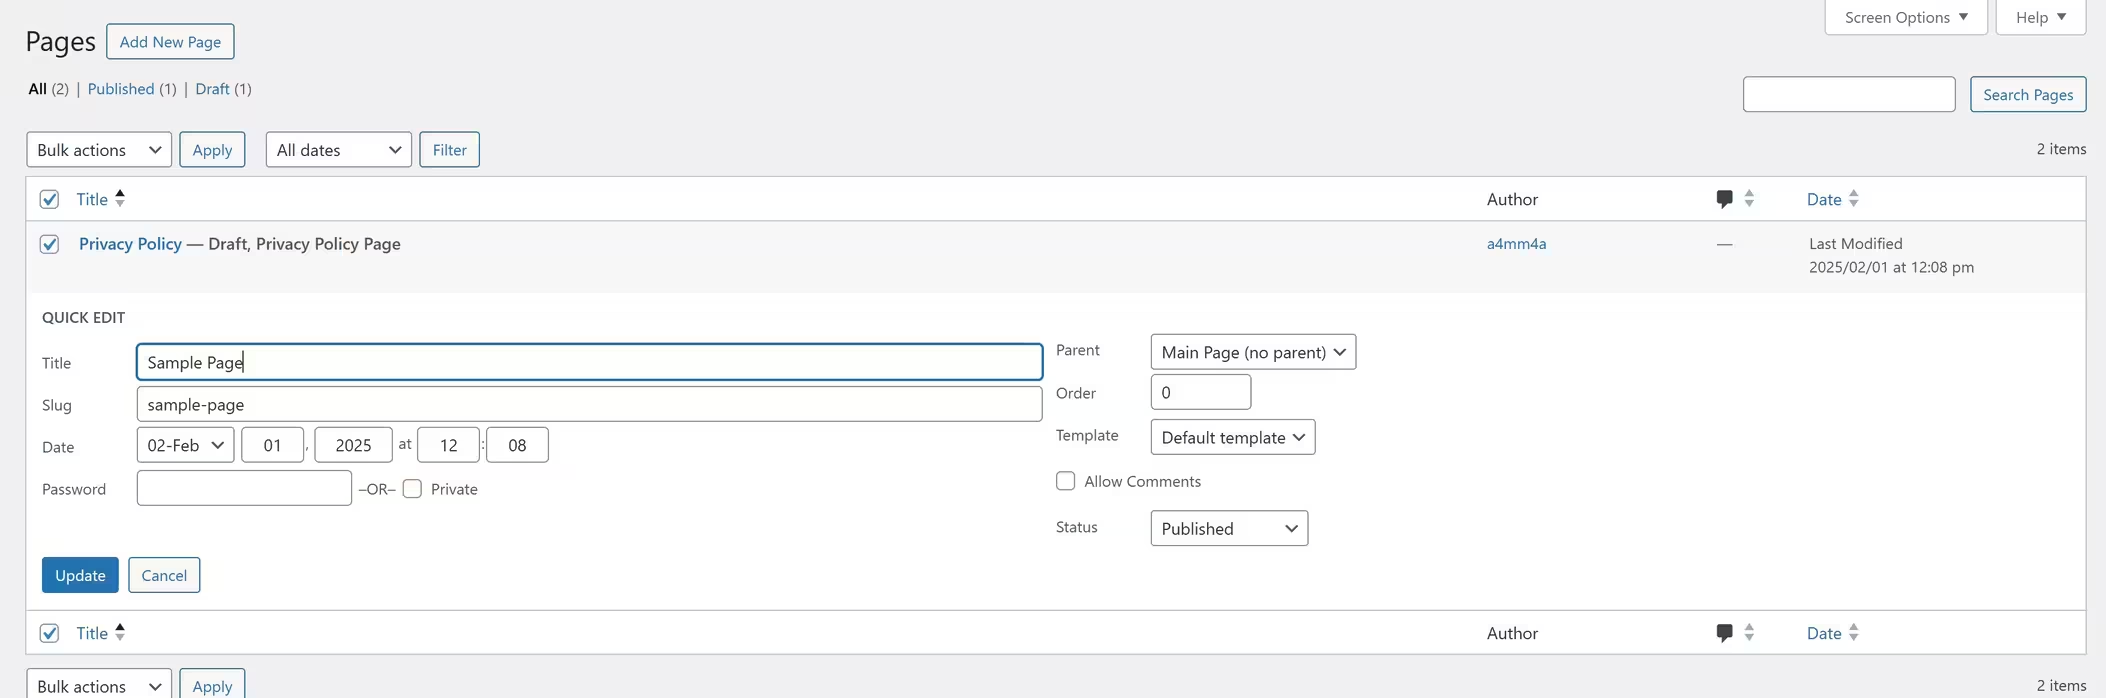
☑ Edit – Open full editor to update page content
☑ Quick Edit – Modify title, slug, status, and page attributes without opening the editor
☑ Trash – Remove the page (can be restored from the trash if needed)
☑ Preview – View how the page looks before publishing
💬 Managing Comments in WordPress
The Comments section in WordPress allows you to moderate, edit, and respond to user feedback on your posts. Comments are a great way to engage with your audience, foster discussions, and build a community around your content.
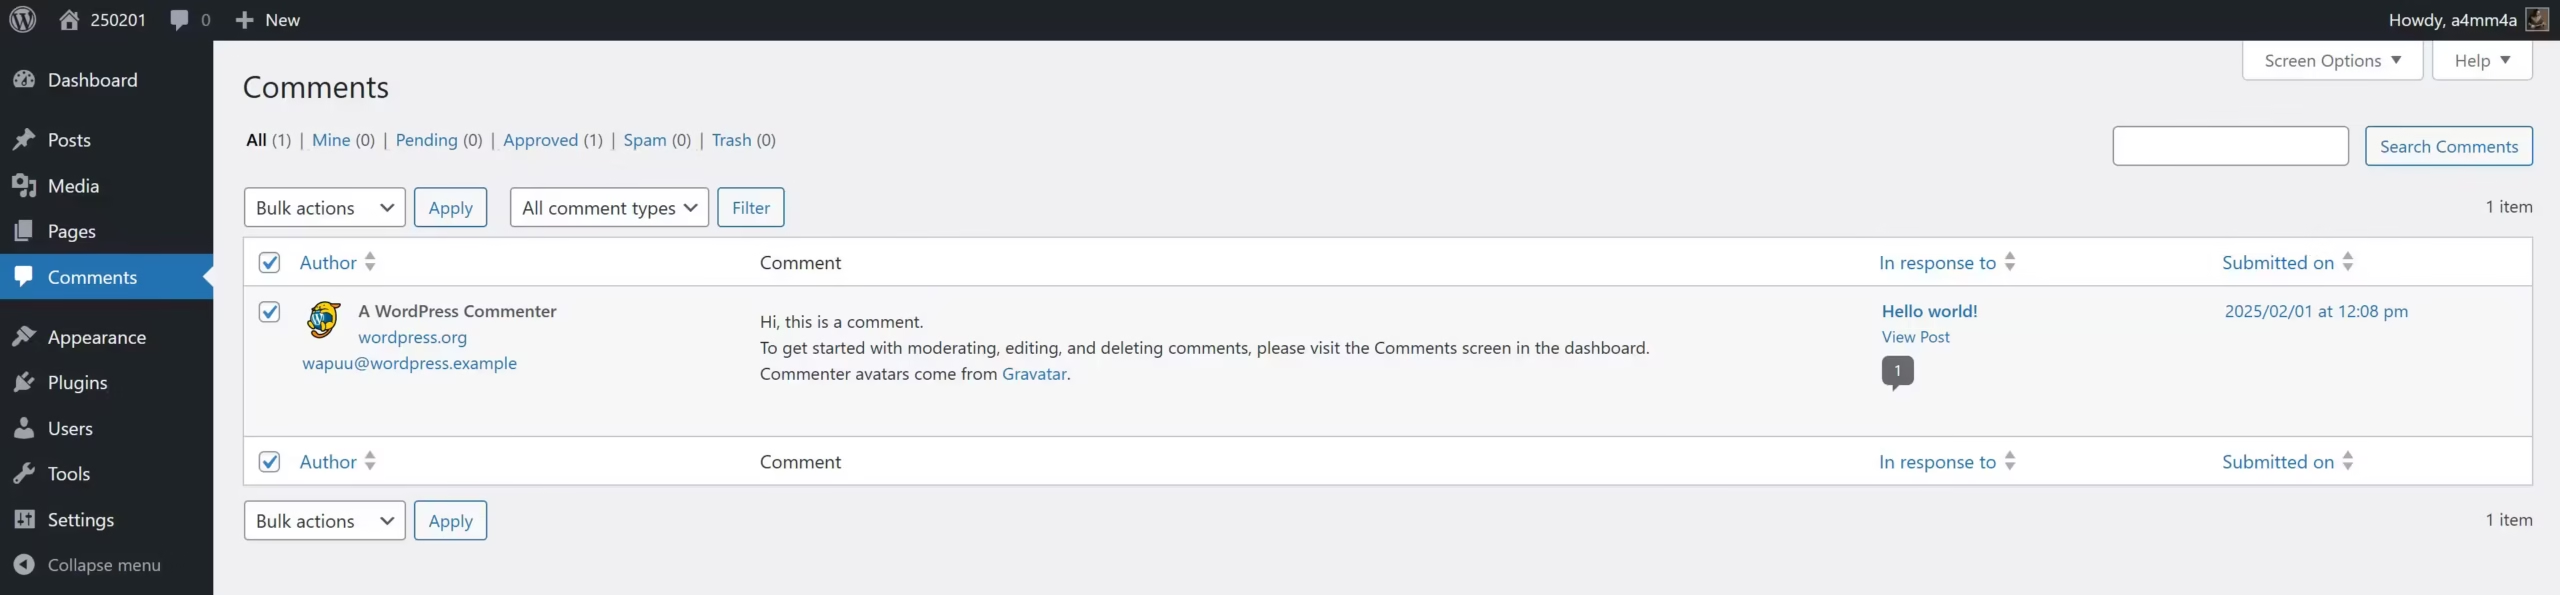
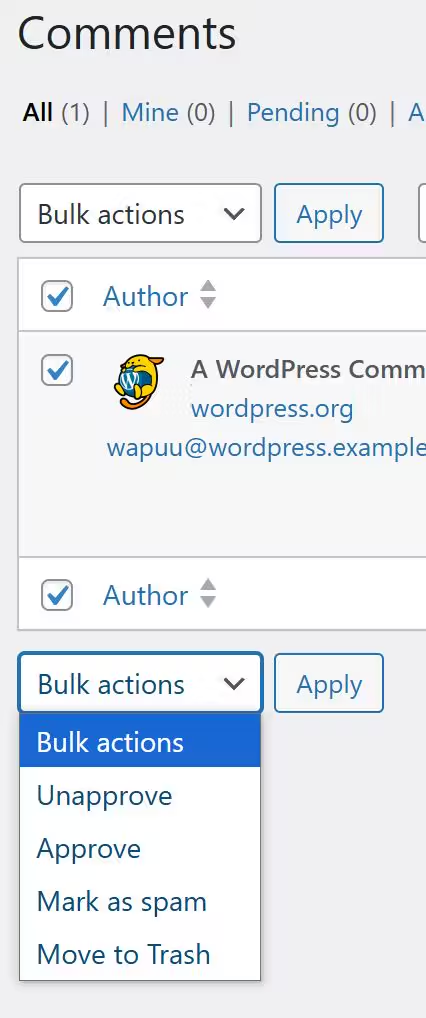
📜 Comments List: Understanding the Moderation Panel
☑ All Comments – View all submitted comments
☑ Mine – Comments you’ve posted as an admin
☑ Pending – Comments awaiting approval before appearing publicly
☑ Approved – Comments that are live on your site
☑ Spam – Suspected spam comments, usually filtered by plugins like Akismet
☑ Trash – Deleted comments (can be restored or permanently removed)
🛠 Moderating Comments

Each comment has several actions you can take:
☑ Approve – Publish the comment so it’s visible to visitors
☑ Unapprove – Hide the comment from public view
☑ Reply – Respond directly to a comment
☑ Quick Edit – Make small text changes without opening the full editor
☑ Edit – Open a full editing interface for the comment
☑ Mark as Spam – Move suspicious comments to spam
☑ Trash – Delete the comment (can be restored from trash if needed)
🗃️ Comment Management Features
☑ Search Comments – Find comments by keywords or author name
☑ Bulk Actions – Approve, mark as spam, or delete multiple comments at once
☑ Filter by Comment Type – Separate general comments from trackbacks or pingbacks
💡 Best Practices for Comment Moderation
✅ Enable comment moderation – Prevent spam and control what gets published
✅ Use anti-spam plugins – Tools like Akismet can help reduce unwanted comments
✅ Engage with your audience – Replying to comments builds relationships and increases engagement
✅ Set comment rules – Decide whether users need an account to comment or if comments require manual approval
🎨 WordPress Themes: Customizing Your Website’s Look
A WordPress theme determines your website’s design, layout, colors, typography, and overall appearance. Whether you’re running a blog, business site, or eCommerce store, choosing the right theme is essential for user experience and branding.
📌 Navigating the Themes Section
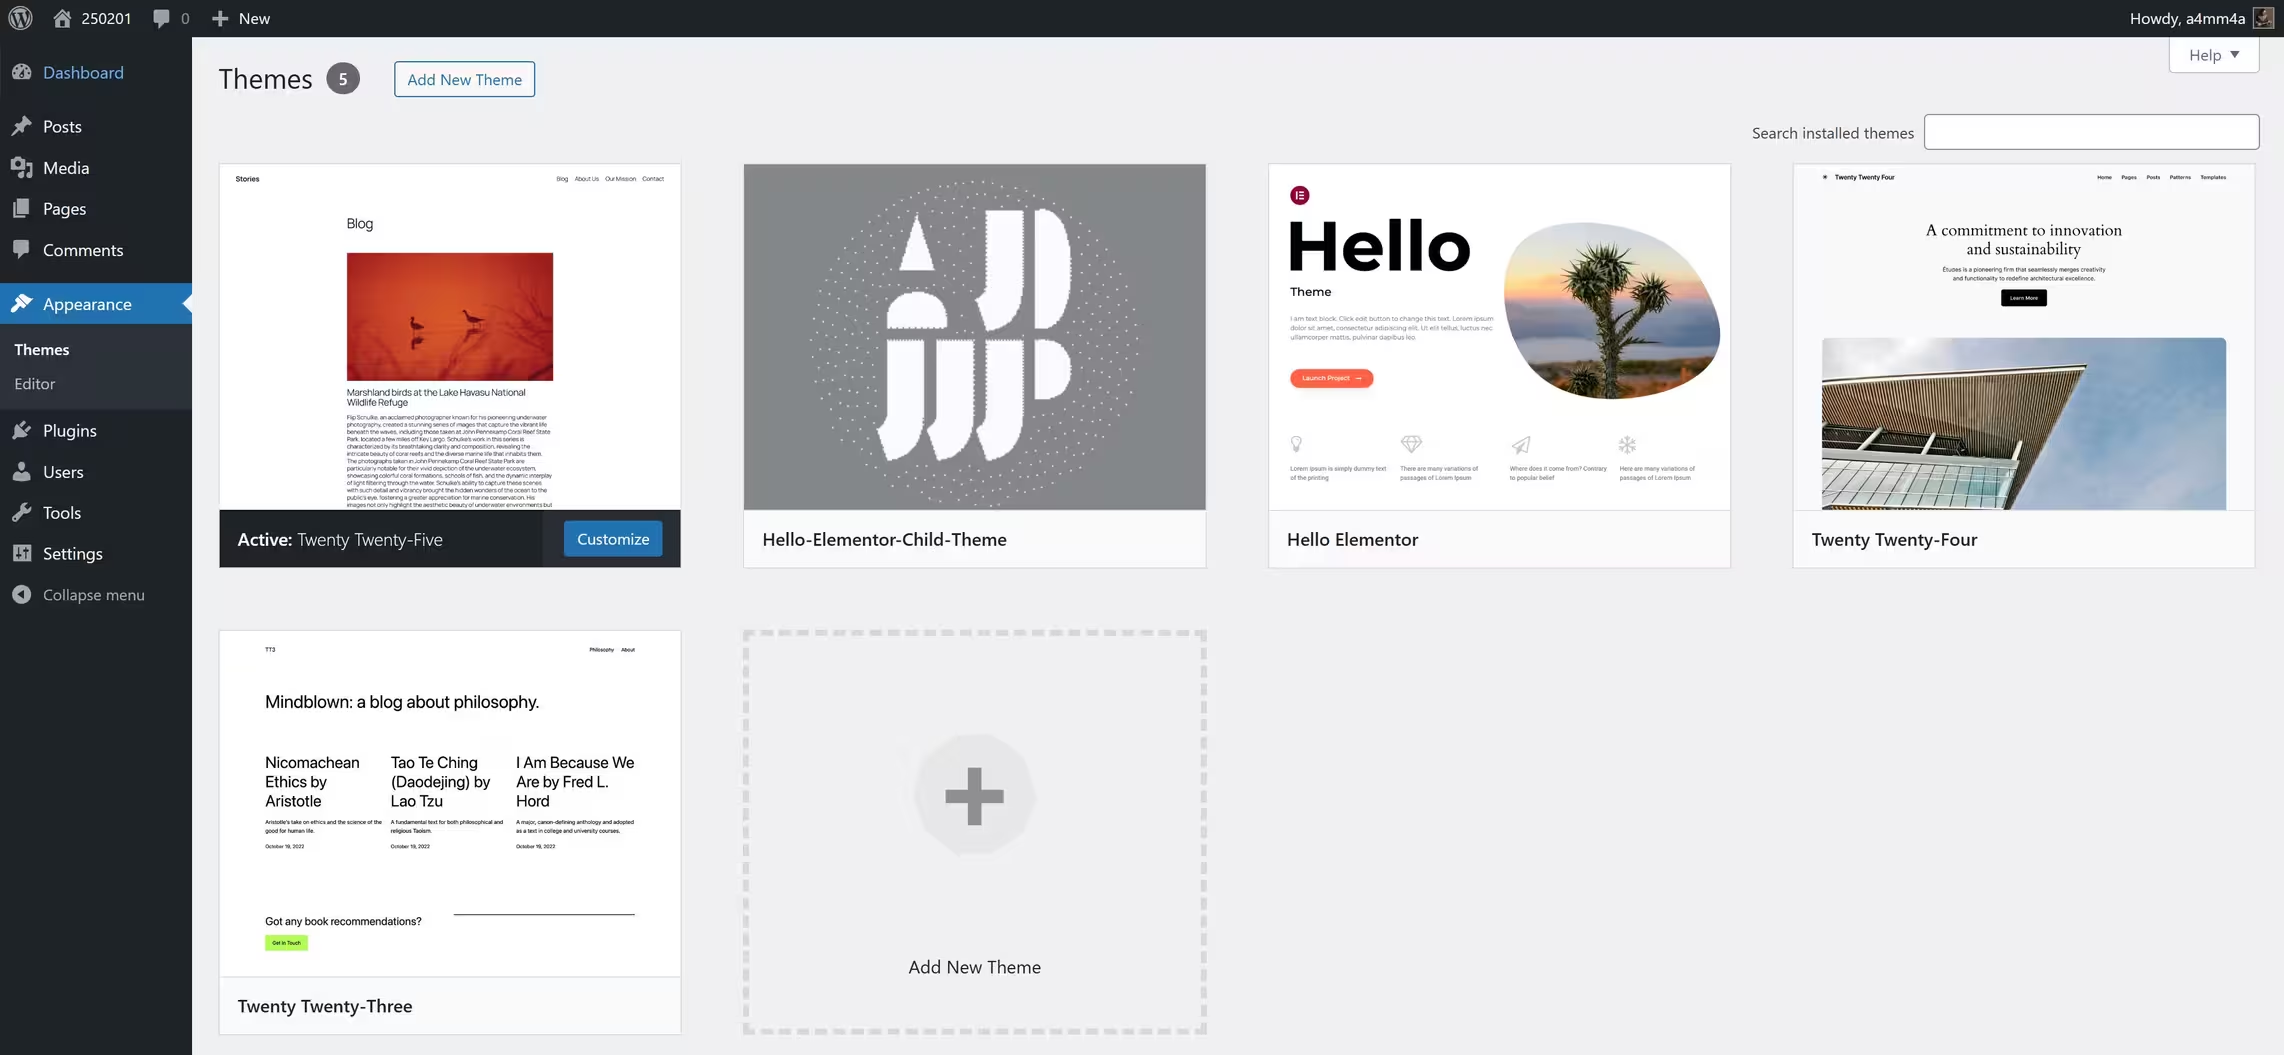
To access and manage your themes, go to:
Dashboard → Appearance → Themes
Here, you will find:
☑ Active Theme – The currently applied theme on your site
☑ Installed Themes – A list of all available themes on your website
☑ Add New Theme – Browse and install themes from the WordPress repository or upload a custom theme
✨ Adding a New Theme in WordPress
👉 Method 1: Install from the WordPress Theme Directory
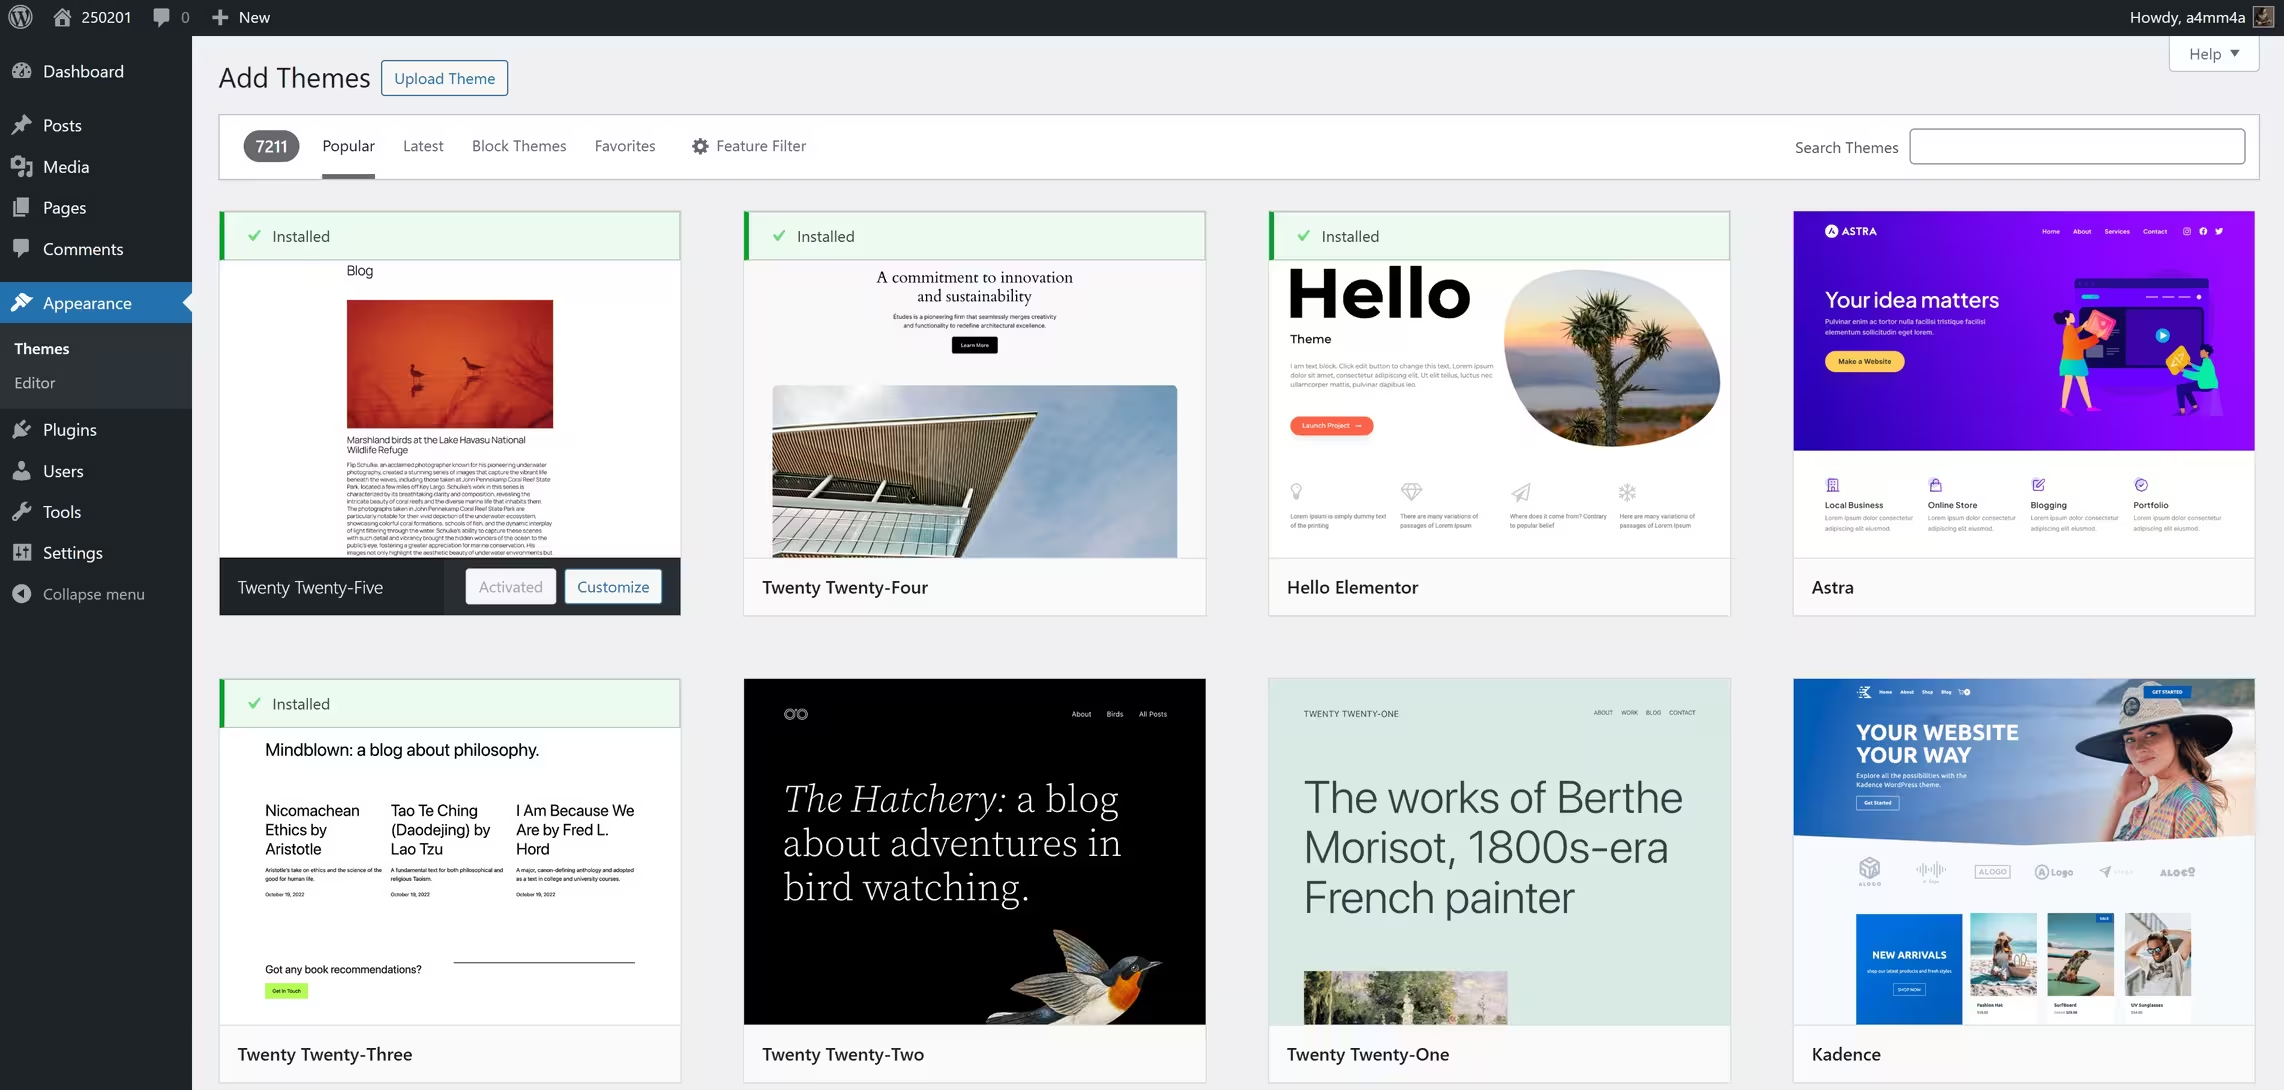
1️⃣ Go to: Dashboard → Appearance → Themes → Add New
2️⃣ Browse or search for a theme in the WordPress Theme Repository
3️⃣ Click Preview to see how it looks before installing
4️⃣ Click Install, then Activate to apply the theme
👉 Method 2: Upload a Custom Theme (ZIP File)
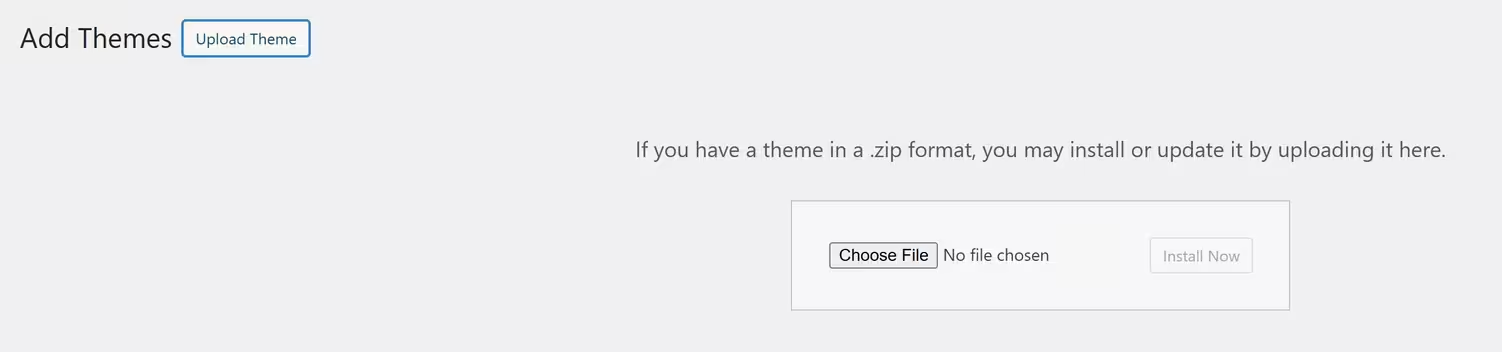
1️⃣ Download a theme from a third-party source (ThemeForest, Elegant Themes, etc.)
2️⃣ Go to: Appearance → Themes → Add New → Upload Theme
3️⃣ Click Choose File, select the .zip file, and click Install Now
4️⃣ Click Activate to apply the theme
🎛 Customizing Your Theme
Once you activate a theme, customize it to match your brand:
☑ Dashboard → Appearance → Customize
☑ Change site title, logo, and favicon
☑ Adjust colors, fonts, and layouts
☑ Configure menus, widgets, and homepage settings
☑ Preview changes in real-time before publishing
💡 Choosing the Right Theme: Best Practices
✅ Responsive Design – Ensure the theme is mobile-friendly 📱
✅ SEO-Friendly – Optimized for search engines to improve rankings
✅ Fast & Lightweight – Avoid slow-loading themes that affect performance
✅ Customization Options – Look for flexible themes with multiple settings
✅ Plugin Compatibility – Make sure it supports popular plugins like WooCommerce, Elementor, and Yoast SEO
✅ Regular Updates & Support – Check if the theme is maintained and has good support
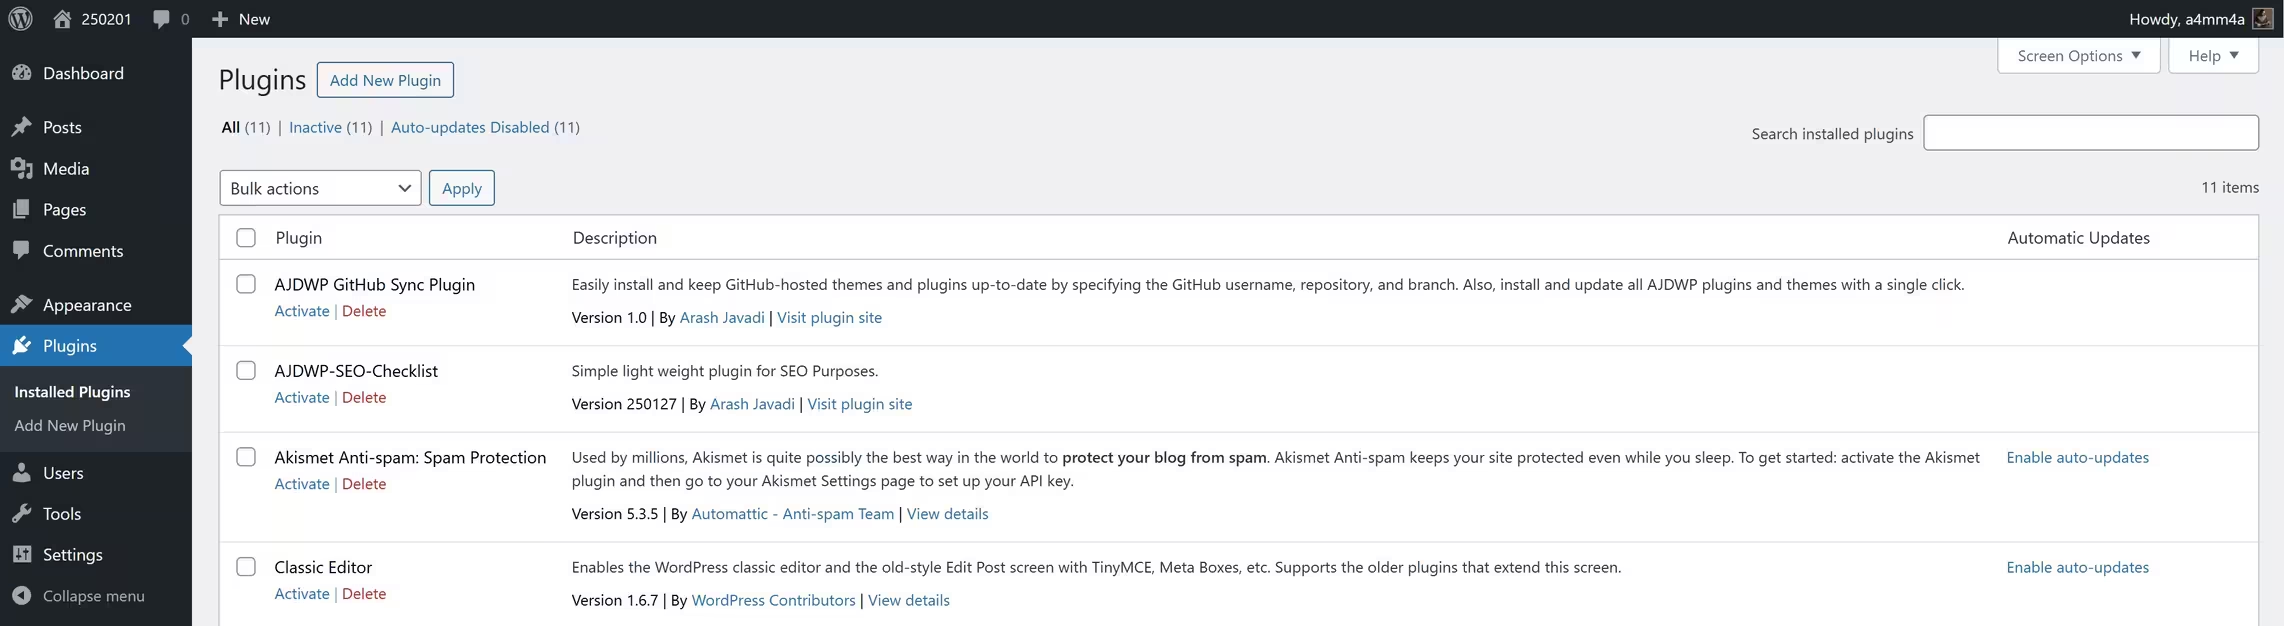
🔌 WordPress Plugins: Extending Your Website’s Functionality
WordPress plugins are tools that add extra features and functionality to your website without requiring coding. Whether you need SEO optimization, security enhancements, eCommerce capabilities, or design improvements, there’s a plugin for everything!
📌 Navigating the Plugins Section
To access and manage your plugins, go to:
Dashboard → Plugins
Here, you will find:
☑ Installed Plugins – A list of all plugins currently installed on your website
☑ Active Plugins – Plugins that are currently running and affecting your site
☑ Inactive Plugins – Installed plugins that are not active yet
☑ Add New Plugin – Search, install, and activate new plugins
☑ Plugin Updates – Manage and update outdated plugins
✨ Adding a New Plugin in WordPress
👉 Method 1: Install from the WordPress Plugin Directory

1️⃣ Go to: Dashboard → Plugins → Add New
2️⃣ Browse or search for a plugin using keywords
3️⃣ Click Install Now on the desired plugin
4️⃣ Click Activate to start using it
👉 Method 2: Upload a Custom Plugin (ZIP File)

1️⃣ Download the plugin from a third-party source (CodeCanyon, developer websites, etc.)
2️⃣ Go to: Plugins → Add New → Upload Plugin
3️⃣ Click Choose File, select the .zip file, and click Install Now
4️⃣ Click Activate to enable the plugin
⚙️ Managing Installed Plugins
After installing plugins, you can manage them from the Plugins → Installed Plugins section:
☑ Activate – Enables the plugin’s functionality
☑ Deactivate – Temporarily disables the plugin
☑ Update – Keeps the plugin secure and up to date
☑ Delete – Removes unused plugins to optimize performance
☑ Settings – Configure plugin options from the dashboard
💡 Best Practices for Using Plugins
✅ Use only essential plugins – Too many plugins can slow down your site
✅ Keep plugins updated – Regular updates improve security and performance
✅ Check compatibility – Ensure the plugin works with your WordPress version
✅ Backup before installing new plugins – Prevent conflicts or crashes
✅ Remove unused plugins – Deactivate and delete unnecessary plugins
👤 WordPress Users, Tools, and Settings: Essential Guide
WordPress provides various user roles, tools, and settings to help manage your website efficiently. In this section, we’ll cover:
✅ Users – Managing roles and permissions
✅ Tools – Import, export, and site management features
✅ Settings – Configuring your website for optimal SEO and performance
👥 WordPress Users: Managing Roles & Permissions

To manage users, go to:
Dashboard → Users
Here, you can:
☑ View all users on your website
☑ Add new users with specific roles
☑ Edit or delete users
User Roles & Permissions
WordPress comes with predefined user roles, each with different access levels:
🔹 Administrator – Full control over the site, including themes, plugins, and user management
🔹 Editor – Can publish and manage all posts, including those from other users
🔹 Author – Can write, edit, and publish their own posts
🔹 Contributor – Can write and edit their own posts but cannot publish
🔹 Subscriber – Can only manage their own profile
SEO Tip:
Assign roles carefully! Give Editors and Authors access to content, but restrict plugin/theme settings to Administrators to avoid accidental SEO mistakes.
🛠 WordPress Tools: Essential Utilities
To access tools, go to:
Dashboard → Tools
🚀 Available Tools
☑ Import – Bring in content from other platforms (e.g., Blogger, Tumblr)
☑ Export – Download a backup of your posts, pages, and media
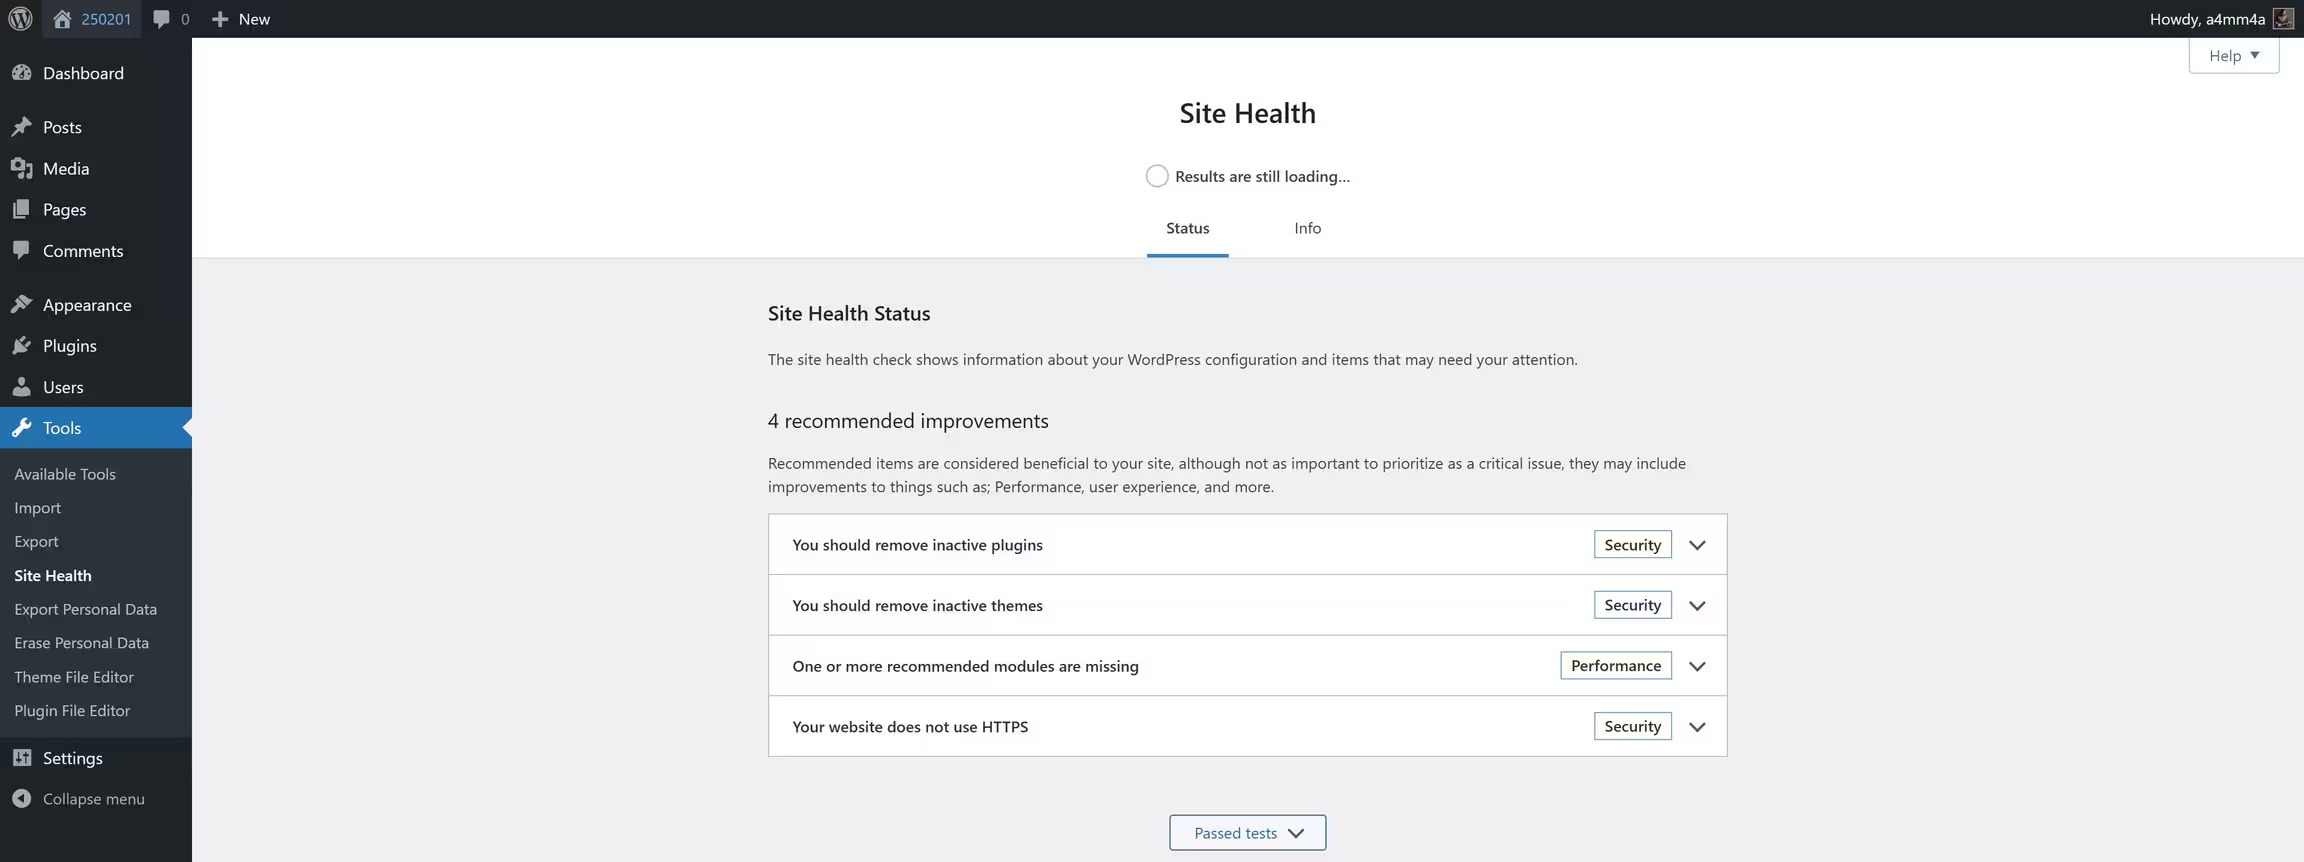
☑ Site Health – Check performance & security issues
☑ Redirection (via plugin) – Redirect broken links to maintain SEO rankings
SEO Tip:
Use Redirection Plugins to fix broken links, preventing SEO penalties.
⚙️ WordPress Settings: Optimizing for SEO
To access settings, go to:
Dashboard → Settings
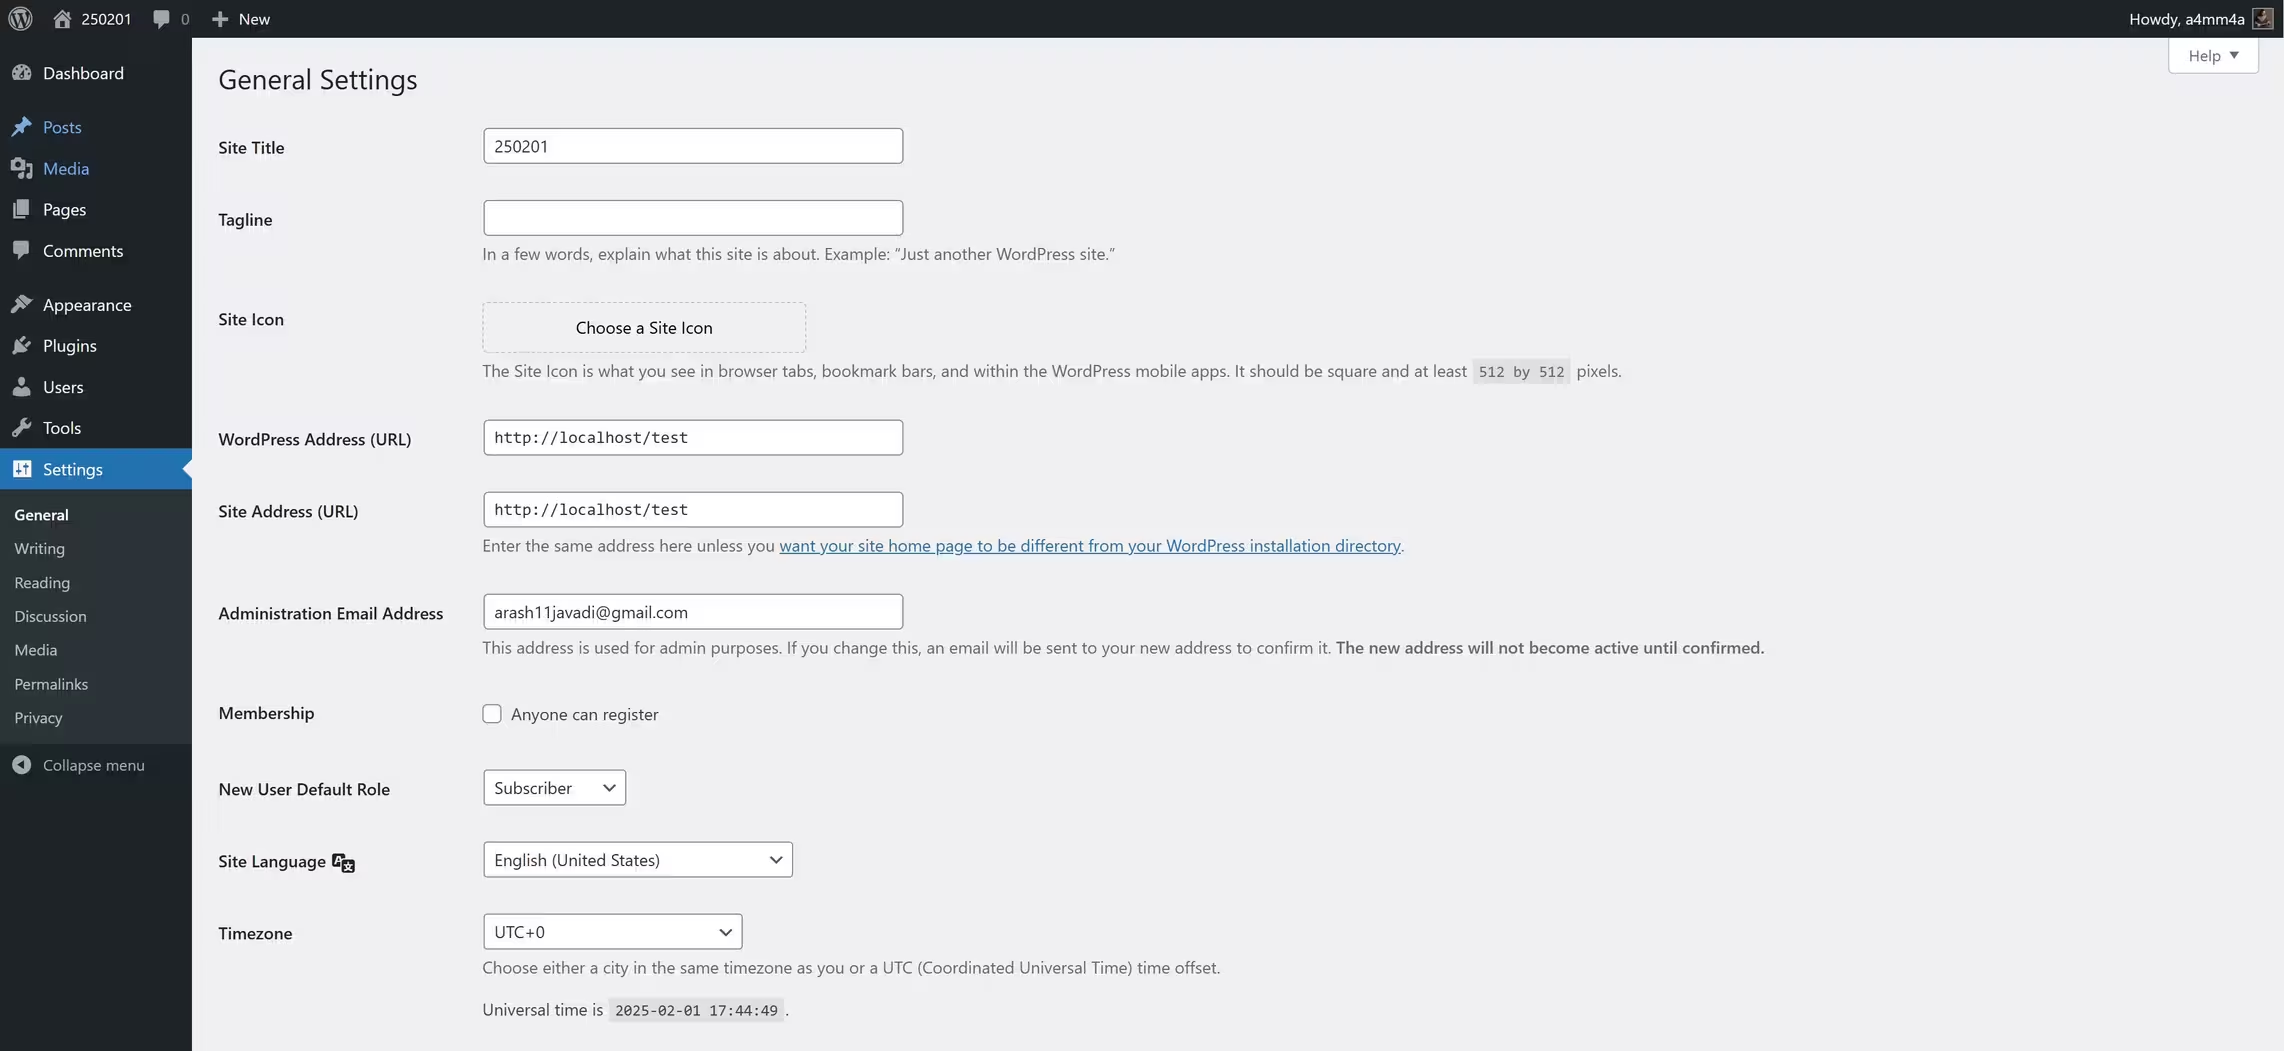
🌍 General Settings
☑ Site Title & Tagline – Defines your website’s identity
☑ WordPress Address (URL) – Ensure it’s set to HTTPS for SEO benefits
☑ Site Language & Timezone – Set according to your audience
📝 Writing Settings
☑ Default Post Category – Organize content for better SEO
☑ Default Post Format – Keep it “Standard” unless using a specific format
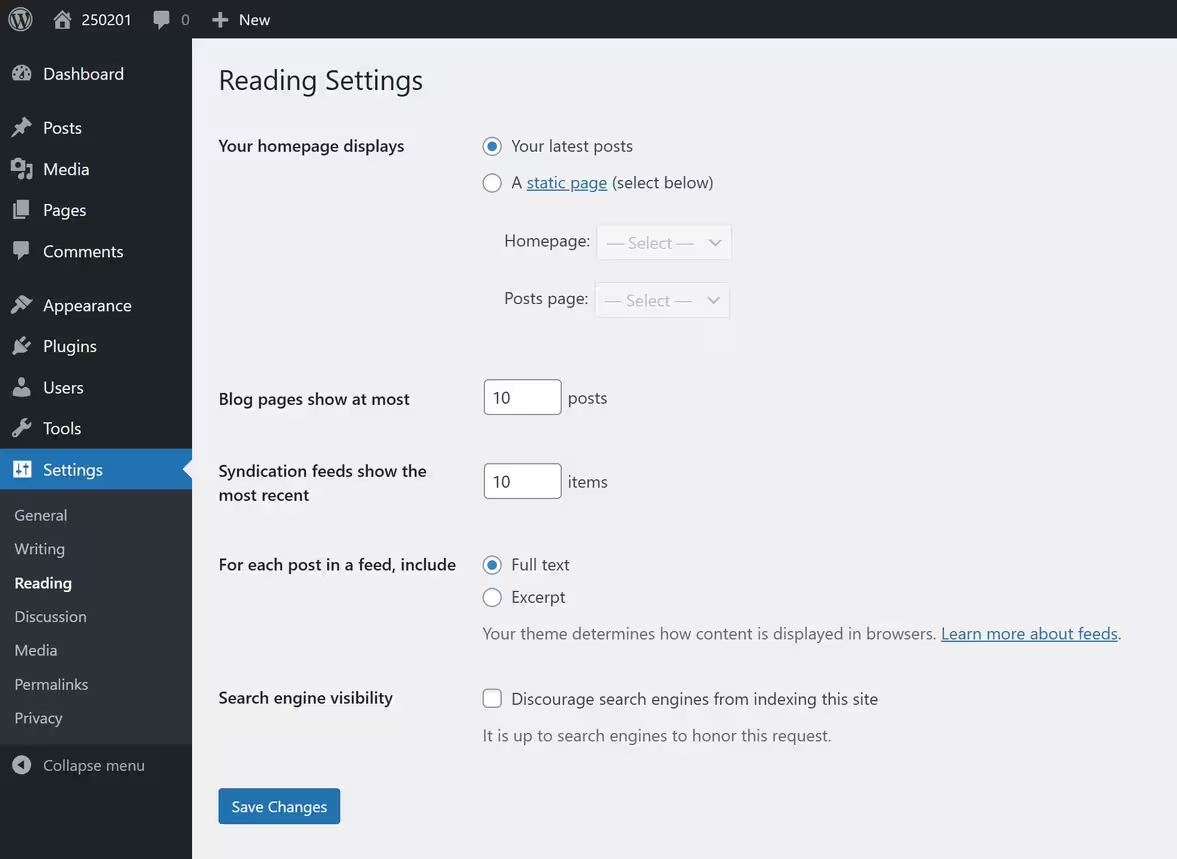
📖 Reading Settings
☑ Homepage Displays – Choose between a blog page or a static homepage
☑ Search Engine Visibility – Ensure “Discourage search engines” is unchecked to allow Google indexing
💬 Discussion Settings
☑ Comment Moderation – Prevent spam comments that harm SEO
☑ Gravatar Settings – Control user avatars in comments
📸 Media Settings
☑ Image Sizes – Optimize images for faster loading
☑ Organize Media into Folders – Helps with structured content management
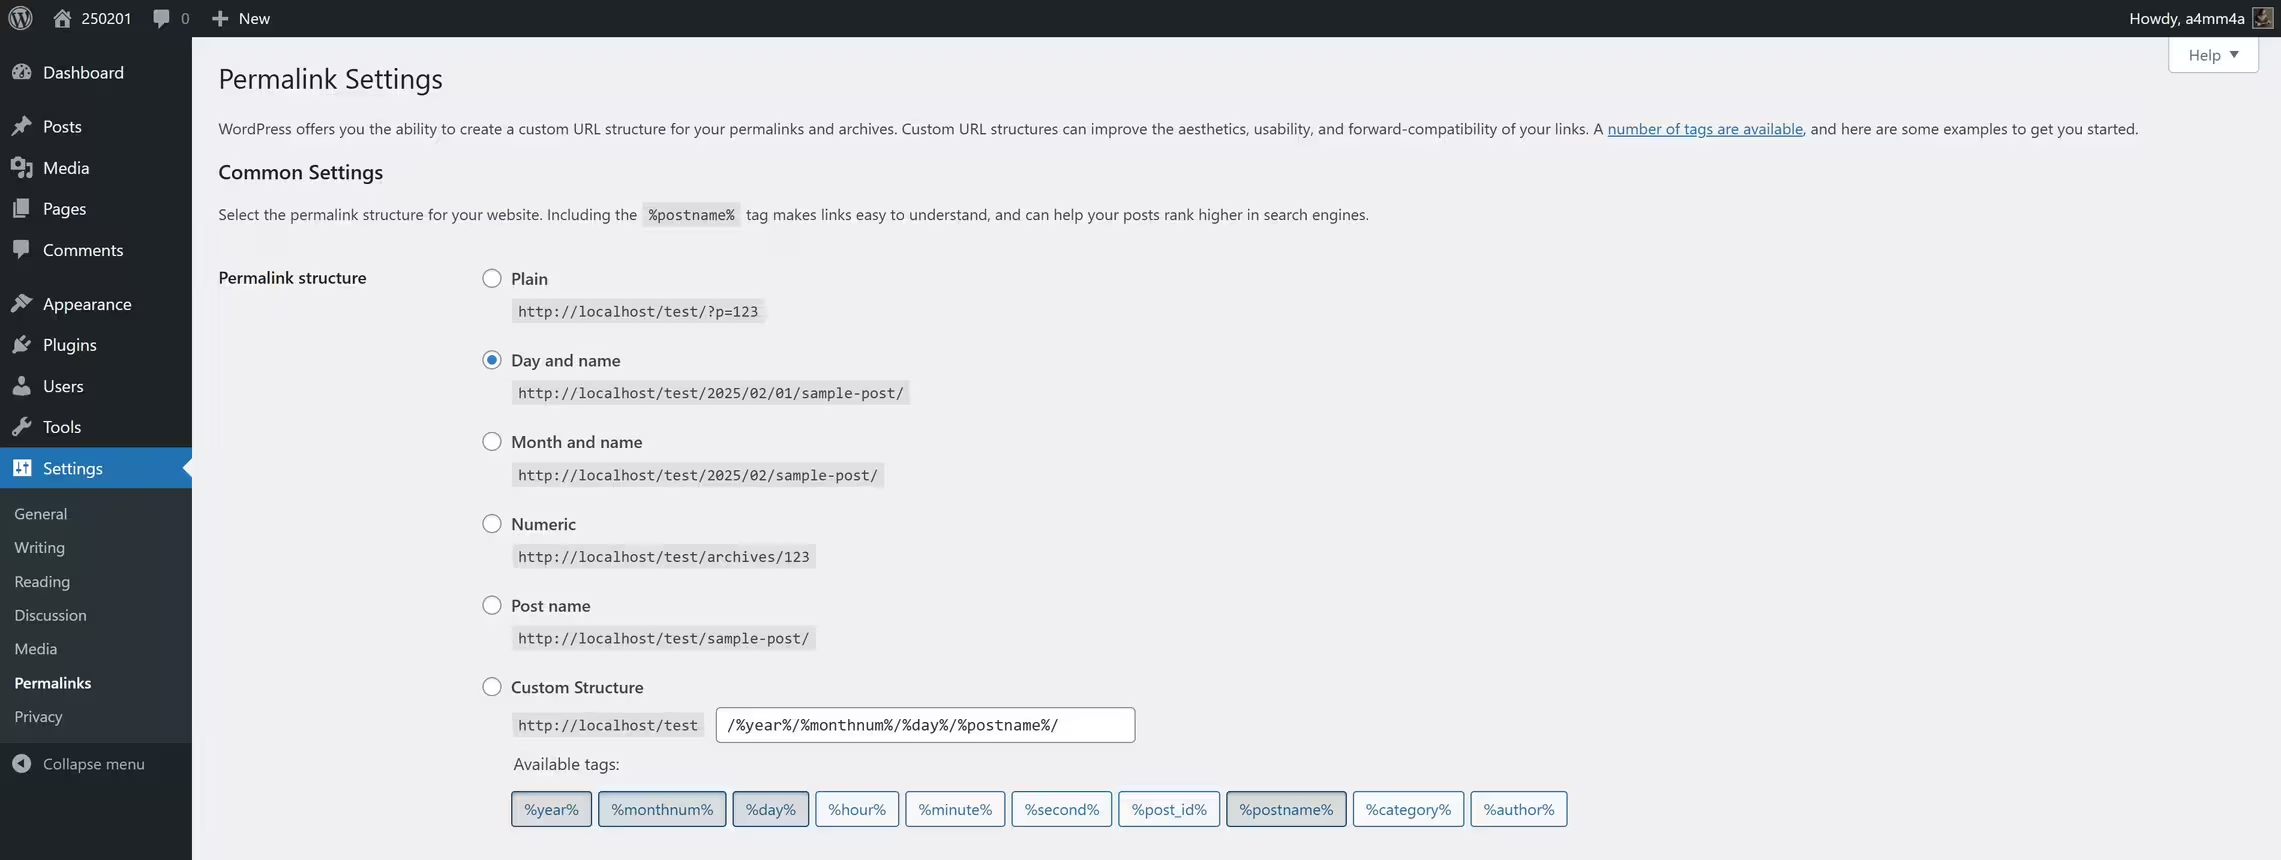
🔗 Permalinks (CRUCIAL for SEO!)
☑ Set URL Structure to Post Name:
✅ Recommended: https://yourdomain.com/sample-post/
❌ Avoid: https://yourdomain.com/?p=123
☑ Custom URLs Improve SEO Rankings
✉️ Privacy Settings
☑ Set a Privacy Policy Page – Important for GDPR compliance
☑ Display privacy policy link in the footer
🚀 On The Next Tutorials:
👉 Explore how to create and edit posts & pages.
👉 Discover essential themes & plugins and their benefits.
👉 Learn about the best tools for building a high-quality website.